Gradle offers the best build automation tools in Android Studio. It’s used to build, test, and package Android apps.
However, the Gradle build times can be slow, more so if you are developing large projects. This further affects Android developer productivity.
To speed up Gradle build time, there are several ways we can optimize the phases; the first initialization, the configuration, and the final execution.
Before we cover ways to optimize Gradle build speed in Android Studio, let’s get the Gradle build system basics.
What is Gradle build?
Gradle is an open-source build automation toolkit for building any type of software with flexibility using solutions like Android, JVM languages, Scala, Java, and Groovy.
The Gradle build is a process for creating Gradle projects. The Gradle build process involves compiling, linking, testing, and packaging the code.
How do I set up Gradle Build?
Here are the steps to set up Gradle build in your local system.
Step 1: Check if Java is installed in your local system
To check if Java is installed in your system; go to the command prompt and type the Java version. If it’s installed, then you can go ahead and install Gradle. If not download Java here.
Step 2: Download Gradle here if you haven’t already installed it.
Step 3: Set environment variables
You can do this by extracting the distribution file and copying it into the desired location.
Step 4: Verify Gradle installation
Open the prompt again, type in the Gradle version, and it will display the current version of Gradle on the screen.
How do I run a Gradle build?
You can Gradle tasks in a couple of ways. For instance, you can add parameters to your task and configure it. Here are the steps to run the Gradle configuration in your project.
Step 1: Open the Gradle tool window
Step 2: Right-click the task for which you want to create the Run Configuration
Step 3: From the context menu select Modify Run Configuration
Step 4: In Create Run Configuration: ‘task name’, you can configure the additional options or use default settings and click OK.
How to make Gradle build in Android Studio?
The Android Gradle plugin comes with several features to speed up the building of Android apps.
It’s essential to note that Gradle and Android Gradle plugins run independently of Android Studio. This means you can run the app development within the studio or on a machine where it's installed.
Both the Android Gradle plugin and Gradle help you configure some of these aspects in your build with Android Studio.
- Product flavors - Different versions of your app like free and paid versions.
- Dependencies - Enable easy management of build systems from either remote repositories or your local file system.
- Multiple APK support The build system lets you add different APKs automatically.
- Build types - They define certain properties that Gradle uses when building and packaging your app.
How to into increase your Gradle Build speed?
Inspect your build
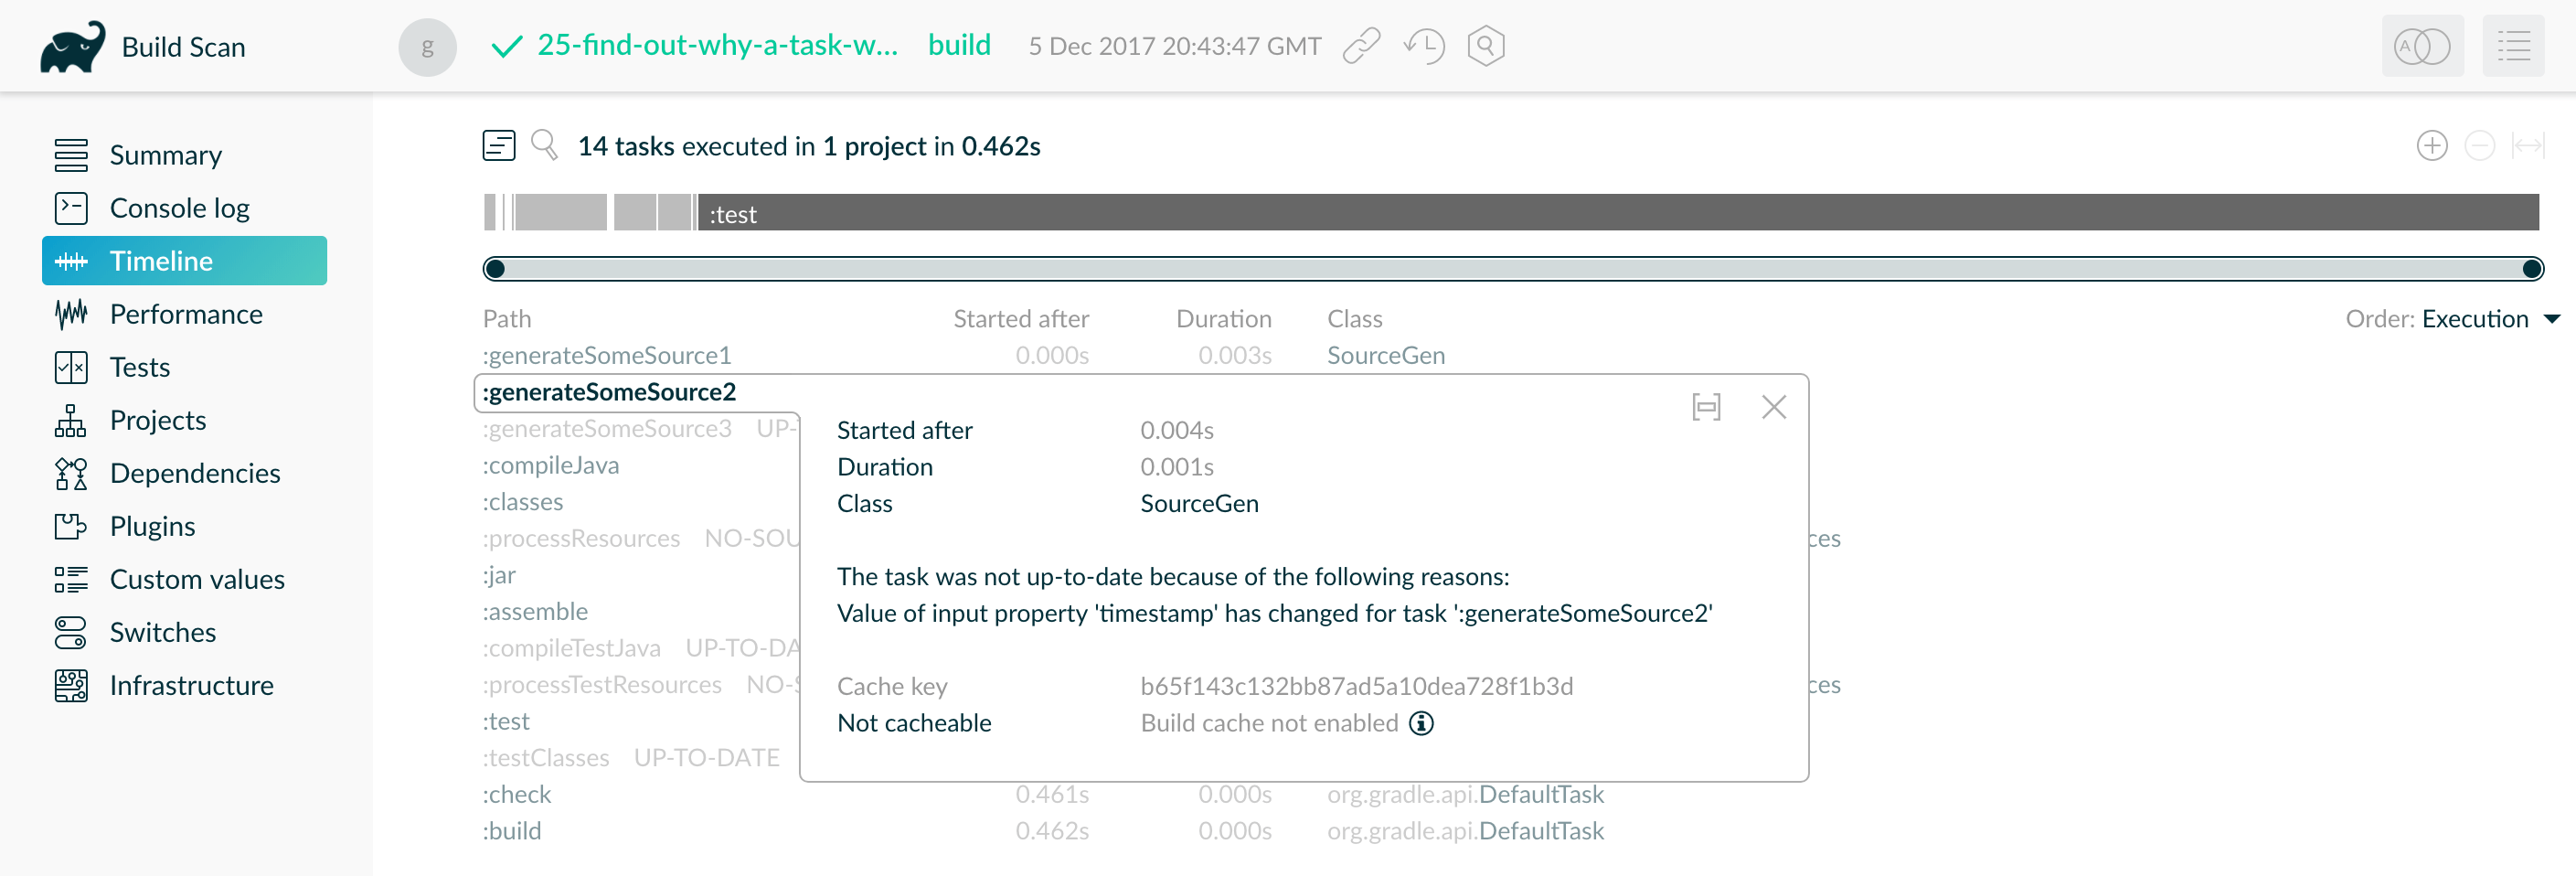
The first thing is to inspect the Gradle build before you make any changes. You use either a build scan or a profile report.
The build scans provide an overall inspection of the build to determine any build issues before continuing. Perpetual scans are significant to get ahead of any build performance problems.
A proper build inspection allows you to understand the following:
- The period it will take to build the project
- The sections of the build that are slow and need optimization
During the inspection process, you can also take the time and update your toolkit versions. These may include;
- Gradle Stay up-to-date with the latest versions of Gradle to keep tabs on your Gradle build performances.
- Java - Since Gradle runs on Java Virtual Machine (JVM), the latest upgrade of Java benefits Gradle. To get the best Gradle to build performance, use the latest Java version.
- Plugins Android, Java, and Kotlin that are pivotal for Gradle builds get upgraded continuously. For better build performance, use the latest versions as well.
Enable parallel execution
Sometimes called parallelism, parallel execution is the idea of breaking down a task. Instead, of one process running wholly, you break down into many processes to run for the same task at the same time.
However, by default, you can only run one task with Gradle. To enable parallel execution for subprojects, use the parallel flag.
$ gradle <task> --parallel
Also, you can execute parallelism in default mode by adding the following setting to the gradle.properties file in the project root or your Gradle home.
gradle.properties
org. gradle.parallel=true
Parallel execution improves build time significantly. However, the caveat is that the project can’t be a single task. Neither will a project with inter-subproject dependencies.
Additionally, using build scans, you can visualize timeline execution.

Re-enable the Gradle Daemon
A daemon is a computer program that runs as a background process without being under the direct control of the interactive users.
A Gradle Daemon reduces the build time for app development in the following ways;
- Running in the background so every Gradle build doesn’t have to wait for JVM startup.
- caching project information across builds
- watching the file system to calculate exactly what needs to be rebuilt before you run a build
- benefiting from continuous runtime optimization in the JVM
Assuming you already have the Java Development Kit (JDK) installed, you can view all Daemon with the jps command.
Since the Gradle 3.0 release, Daemon is enabled by default. However, if your Gradle build doesn’t have enabled, you re-enable the Gradle Daemon with a single built-in _daemon flag when you run a build.
$ gradle <task> --daemon
The flag overrides any settings that disable the Daemon in your project or user gradle.properties files.
Enable the build cache
The build cache is a cache mechanism that aims to save time by re-using the outputs produced by other builds.
It simply works by restoring ( locally or remotely) build outputs and allowing builds to retrieve these outputs when it's determined that the inputs have not changed.
This reduces the time and expense of regenerating them.
However, Gradle does not use a cache by default. You can enable it at build time using the build cache flag.
$ gradle <task> --build-cache
To enable build cache in your Gradle home or file in the project root, add the following setting to the gradle.properties.
gradle.properties
org. gradle.caching=true
Enable configuration on cache
Even though the configuration cache does not support all core Gradle plugins and features.
Enabling the configuration cache is possible during the configuration phase. Build configuration inputs includes the following;
- Build scripts
- Init scripts
- Setting scripts
- Environmental variables used during the configuration phase
- System properties used during the configuration phase
- Gradle properties used during the configuration phase
buildScrinputs, including build configuration inputs and source files.- Configuration files are accessed using value suppliers such as providers.
It’s important to note, Gradle does not use a configuration cache by default currently. You can enable it at build time using the configuration_cache flag.
$ gradle <task> --configuration-cache
Enable incremental build for custom tasks
Incremental builds are builds optimized to keep the target output files up-to-date with the corresponding input files not executed.

This Gradle optimization technic skips running tasks that have been previously executed with the same inputs.
Since most built-in Gradle tasks use incremental build, you can make custom tasks compatible with it by specifying the inputs and outputs.
build.gradle.kts

tasks.register("processTemplatesAdHoc") {
    inputs.property("engine", TemplateEngineType.FREEMARKER)
    inputs.files(fileTree("src/templates"))
        .withPropertyName("sourceFiles")
        .withPathSensitivity(PathSensitivity.RELATIVE)
    inputs.property("templateData.name", "docs")
    inputs.property("templateData.variables", mapOf("year" to "2013"))
    outputs.dir(layout.buildDirectory.dir("genOutput2"))
        .withPropertyName("outputDir")

    doLast {
        // Process the templates here
    }
}
Additionally, you can optimize Gradle build speed by creating builds for specific developer workflows. Also, this help reduces build times for teams that work on unrelated subprojects.
To enable specific developer workflows, create tasks that match developer needs. Gradle provides several features that create these workflows:
- Assign tasks to appropriate groups
- Create _
aggregate tasks_: tasks with no action that only depend on other tasks, such as assemble - Defer configuration via
gradle.taskGraph.whenReady()and others, so you can perform verification only when it’s necessary
Increase the heap size
Gradle reserves 512MB of heap build space by default. Although this is enough for most projects, some large ones may need more memory to hole
the Gradle builds.
You can specify a large heap size by inputting the following property in the gradle.properties in your Gradle home or project root.
gradle.properties
org.gradle.jvmargs=-Xmx2048M
Optimize dependency resolution
Dependency resolution is a process that consists of two phases executed repeatedly until the dependency graph is complete;
- When a new dependency is added to the graph, perform conflicts resolution to determine which version should be added to the graph.
- When a specific dependency - probably a module with a version is identified as part of the graph, retrieve its metadata so that the dependencies can be added in turn.
Dependency resolution simplifies third-party libraries' integrations and other dependencies into your project.
With Gradle making contact with remote servers to discover and download dependencies, you can optimize the way you reference them to cut down on build time.
Here are some ways to optimize dependency resolution:
- Optimize repository order Declare the repository hosting the largest number of your dependencies to reduce the number of network requests required to resolve all dependencies.
- Limit repository count - Minimize the number of declared repositories to reduce your build time.
- Minimize dynamic and snapshot versions Changing the versions forces Gradle to contact remote repositories every 24 hours to find new releases.

Optimize configurations
As I mentioned earlier Gradle builds in three phases:
- Initialization
- Configuration
- Execution
Since configuration code executes regardless of the tasks running, this slows down invocation. However, here are some techniques you can use to reduce the time spent on the configuration phase.
- Avoid blocking work
- Use plugins only where needed
In the event of necessary plugins like Java or any other required JVM language you use, you can optimize the projects for a better Gradle build.
For example, you can optimize the test in the following ways:
- Executing tests in parallel
- Folk tests into multiple processes
- Disabling reports
Speed-up Gradle Build
Whether you are running projects with the old Gradle version, or the new one, you will need tools and tips to optimize Gradle build.
For example, the current Gradle 3.0 has Daemon setting on default mode, but for those running older versions, I have covered how you can re-enable your Gradle Daemon.
To sum up, build performance is essential to an Android developer’s productivity. The less time you spend optimizing your Gradle build, the more time you will spend iterating, adding new features, running experiments, and executing to meet the desired requirements.
Use these optimization solutions for your Gradle Build and see your coding performance improve.
Stay tuned. Happy coding.


