Ever since Android introduced the Jetpack Navigation Component, it's been a breeze to work with, as it eliminated a lot of the tedious code we used to write. Sharing data between fragments is now super easy with the help of SafeArgs and Bundles.
Current Approach
Let's take a quick look at how we can send data from Fragment A to Fragment B using a navController
//for navigating from Fragment1 to Fragment2
findNavController().navigate(R.id.fragment2)

//if we want to pass a data, we can use a bundle like so
val bundle = bundleOf()
bundle.putString(key, value)
findNavController().navigate(R.id.fragment2, bundle)

//for getting back to Fragment1, we can simply pop Fragment 2 from the stack
findNavController().navigateUp()
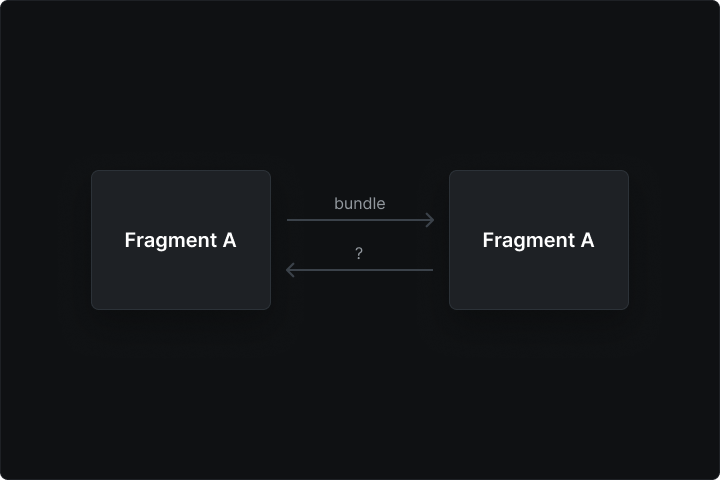
The code snippet above demonstrates how we can send data from Fragment A to Fragment B. But what if we want to pass some data back to Fragment A? We can't simply use a bundle with navigateUp().
One option is to use activityViewModels(), which can be shared among fragments. If a variable changes in activityViewModels(), it'll be updated in all connected fragments. However, this can be a bad idea, as it can make things complicated when dealing with multiple fragments. Plus, the viewModel's lifecycle will last as long as the activity is alive, which can make debugging a headache. So, what's an alternative solution?
Solution
Let's break this down with a simple app that has 2 fragments. FragmentA displays the result, while FragmentB handles the calculations. I'll provide the Github link for this app if you'd like to check out the UI-related aspects. For now, let's focus on how we can pass data from FragmentB to FragmentA.
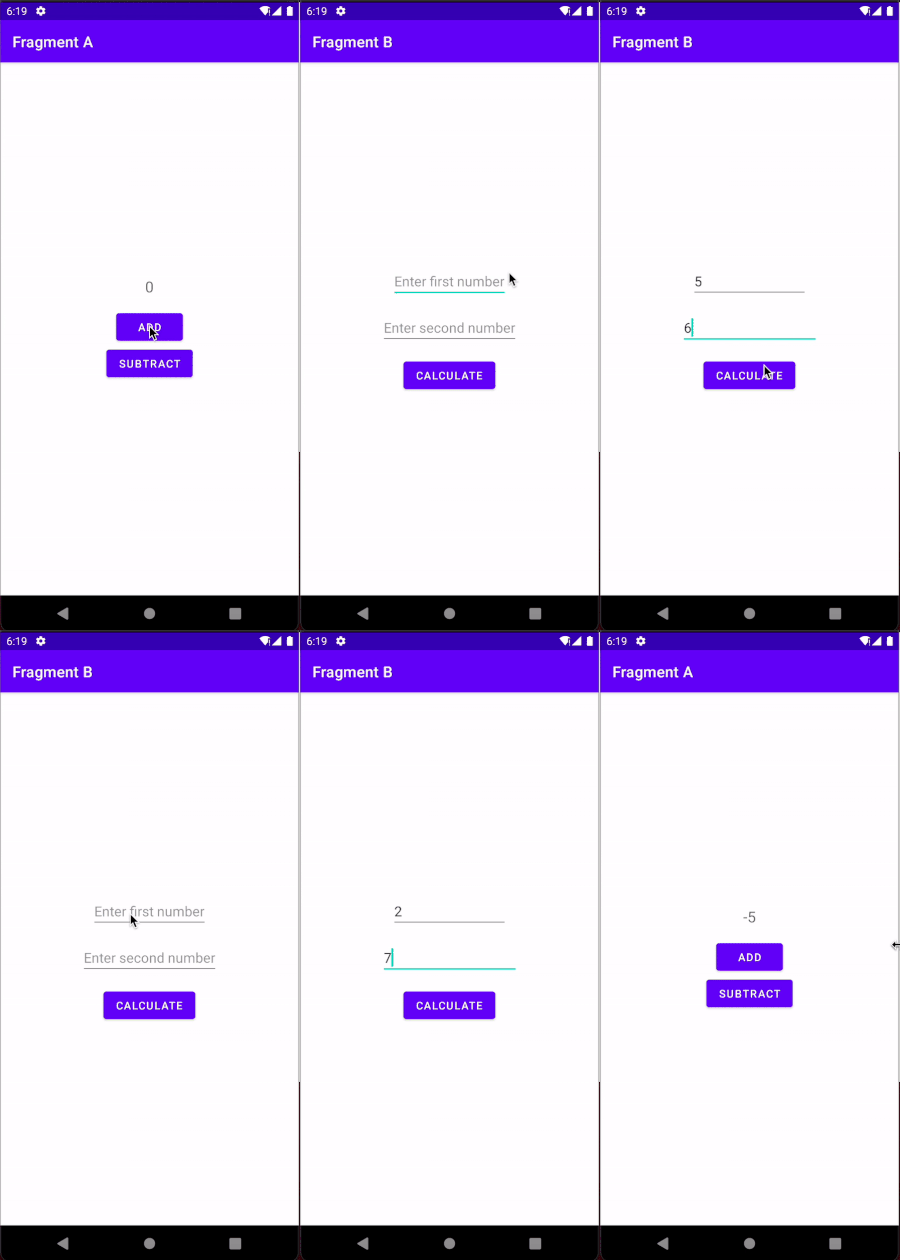
To send data while also removing the fragment from the stack, we can use [savedStateHandle](https://developer.android.com/topic/libraries/architecture/viewmodel/viewmodel-savedstate)
The
SavedStateHandleis a super helpful feature for Android developers. It's like a little storage box where you can put and get data using simpleset()andget()methods. The best part? You can also grab values from the SavedStateHandle that are wrapped in LiveData, thanks to thegetLiveData()method. Whenever a value gets updated, LiveData makes sure to catch the new value. It's all so user-friendly and easy to work with!
In a nutshell, it functions quite like a bundle, but with the added benefit of saving the current state and transferring values between fragments. When you're about to remove FragmentB, you can create a savedStateHandle just like you would with a bundle, using a key-value pair. The key can be any string you define in your companion object, and the value can be any data type or even a parcelable object. In our example, we're passing a simple integer value.
Make sure not to use serializable values, since serialization can eat up a lot of memory, especially when dealing with complex objects. It's better to be cautious!
class FragmentB : Fragment(R.layout.fragment_b) {

    override fun onViewCreated(view: View, savedInstanceState: Bundle?) {
        super.onViewCreated(view, savedInstanceState)

        //...define the views

        calculateButton.setOnClickListener {
            findNavController().apply {
                 previousBackStackEntry
                 ?.savedStateHandle?.set(<your key here>, <pass any value>)
            }.navigateUp()
        }
    }
}
Great job! You've managed to send data from FragmentB. To access this value in FragmentA, just use the same key you used in FragmentB, and you're good to go.
class FragmentA : Fragment(R.layout.fragment_a) {

    override fun onViewCreated(view: View, savedInstanceState: Bundle?) {
        super.onViewCreated(view, savedInstanceState)

        //...define your views

        //get the savedStateHandle you had set in FragmentB
        findNavController().currentBackStackEntry
            ?.savedStateHandle?.let { handle ->
                handle.getLiveData<Int>(<your key here>)
                    .observe(viewLifecycleOwner, { res ->
                        //res is the value you passed from FragmentB
              })
         }
    }
}
Remember to use the currentBackStackEntry's savedStateHandle in Fragment A and the previousBackStackEntry's handle in FragmentB. This way, everything stays organized and works as intended.
SavedStateHandle can handle configuration changes easily. Even if you rotate your phone or switch from multi-window to full screen, the onViewCreated() method will be called after onDestroyView(), but your data will stay safe and sound. If you ever need to clear the values stored in the handle, you can easily do so by:
handle.remove<Int>(<your key>)
By doing this, you'll wipe the handle's value linked to that specific key. That's pretty much all there is to it! Now you can effortlessly retrieve data from any fragment while popping it off the stack.
Feel free to explore my GitHub repo here for the complete source code.
Enjoy!
