Wireless Debugging with Dashwave
Wireless debugging allows developers to connect their physical android devices to Dashwave Cloud and test run their builds on them. Developers can choose to preview their each build for a project on their handset by switching the device selected for preview using the console.
1. Setting up a Physical Device
1.1 Proceed to Pair Device Screen on Console
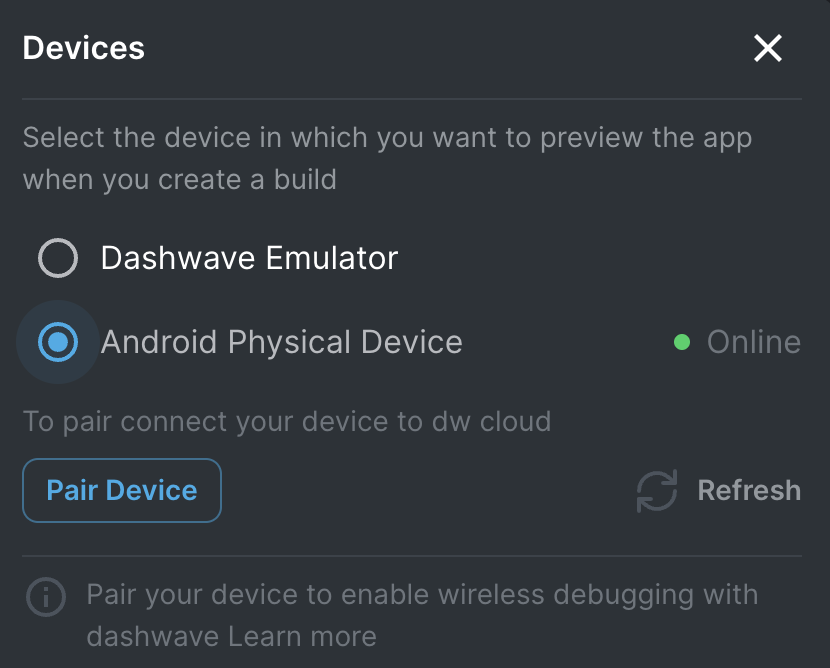
- Go to the project’s page on console. On the top-right, you would find an option to select the emulator device. Click on devices, and a selector modal would open up.
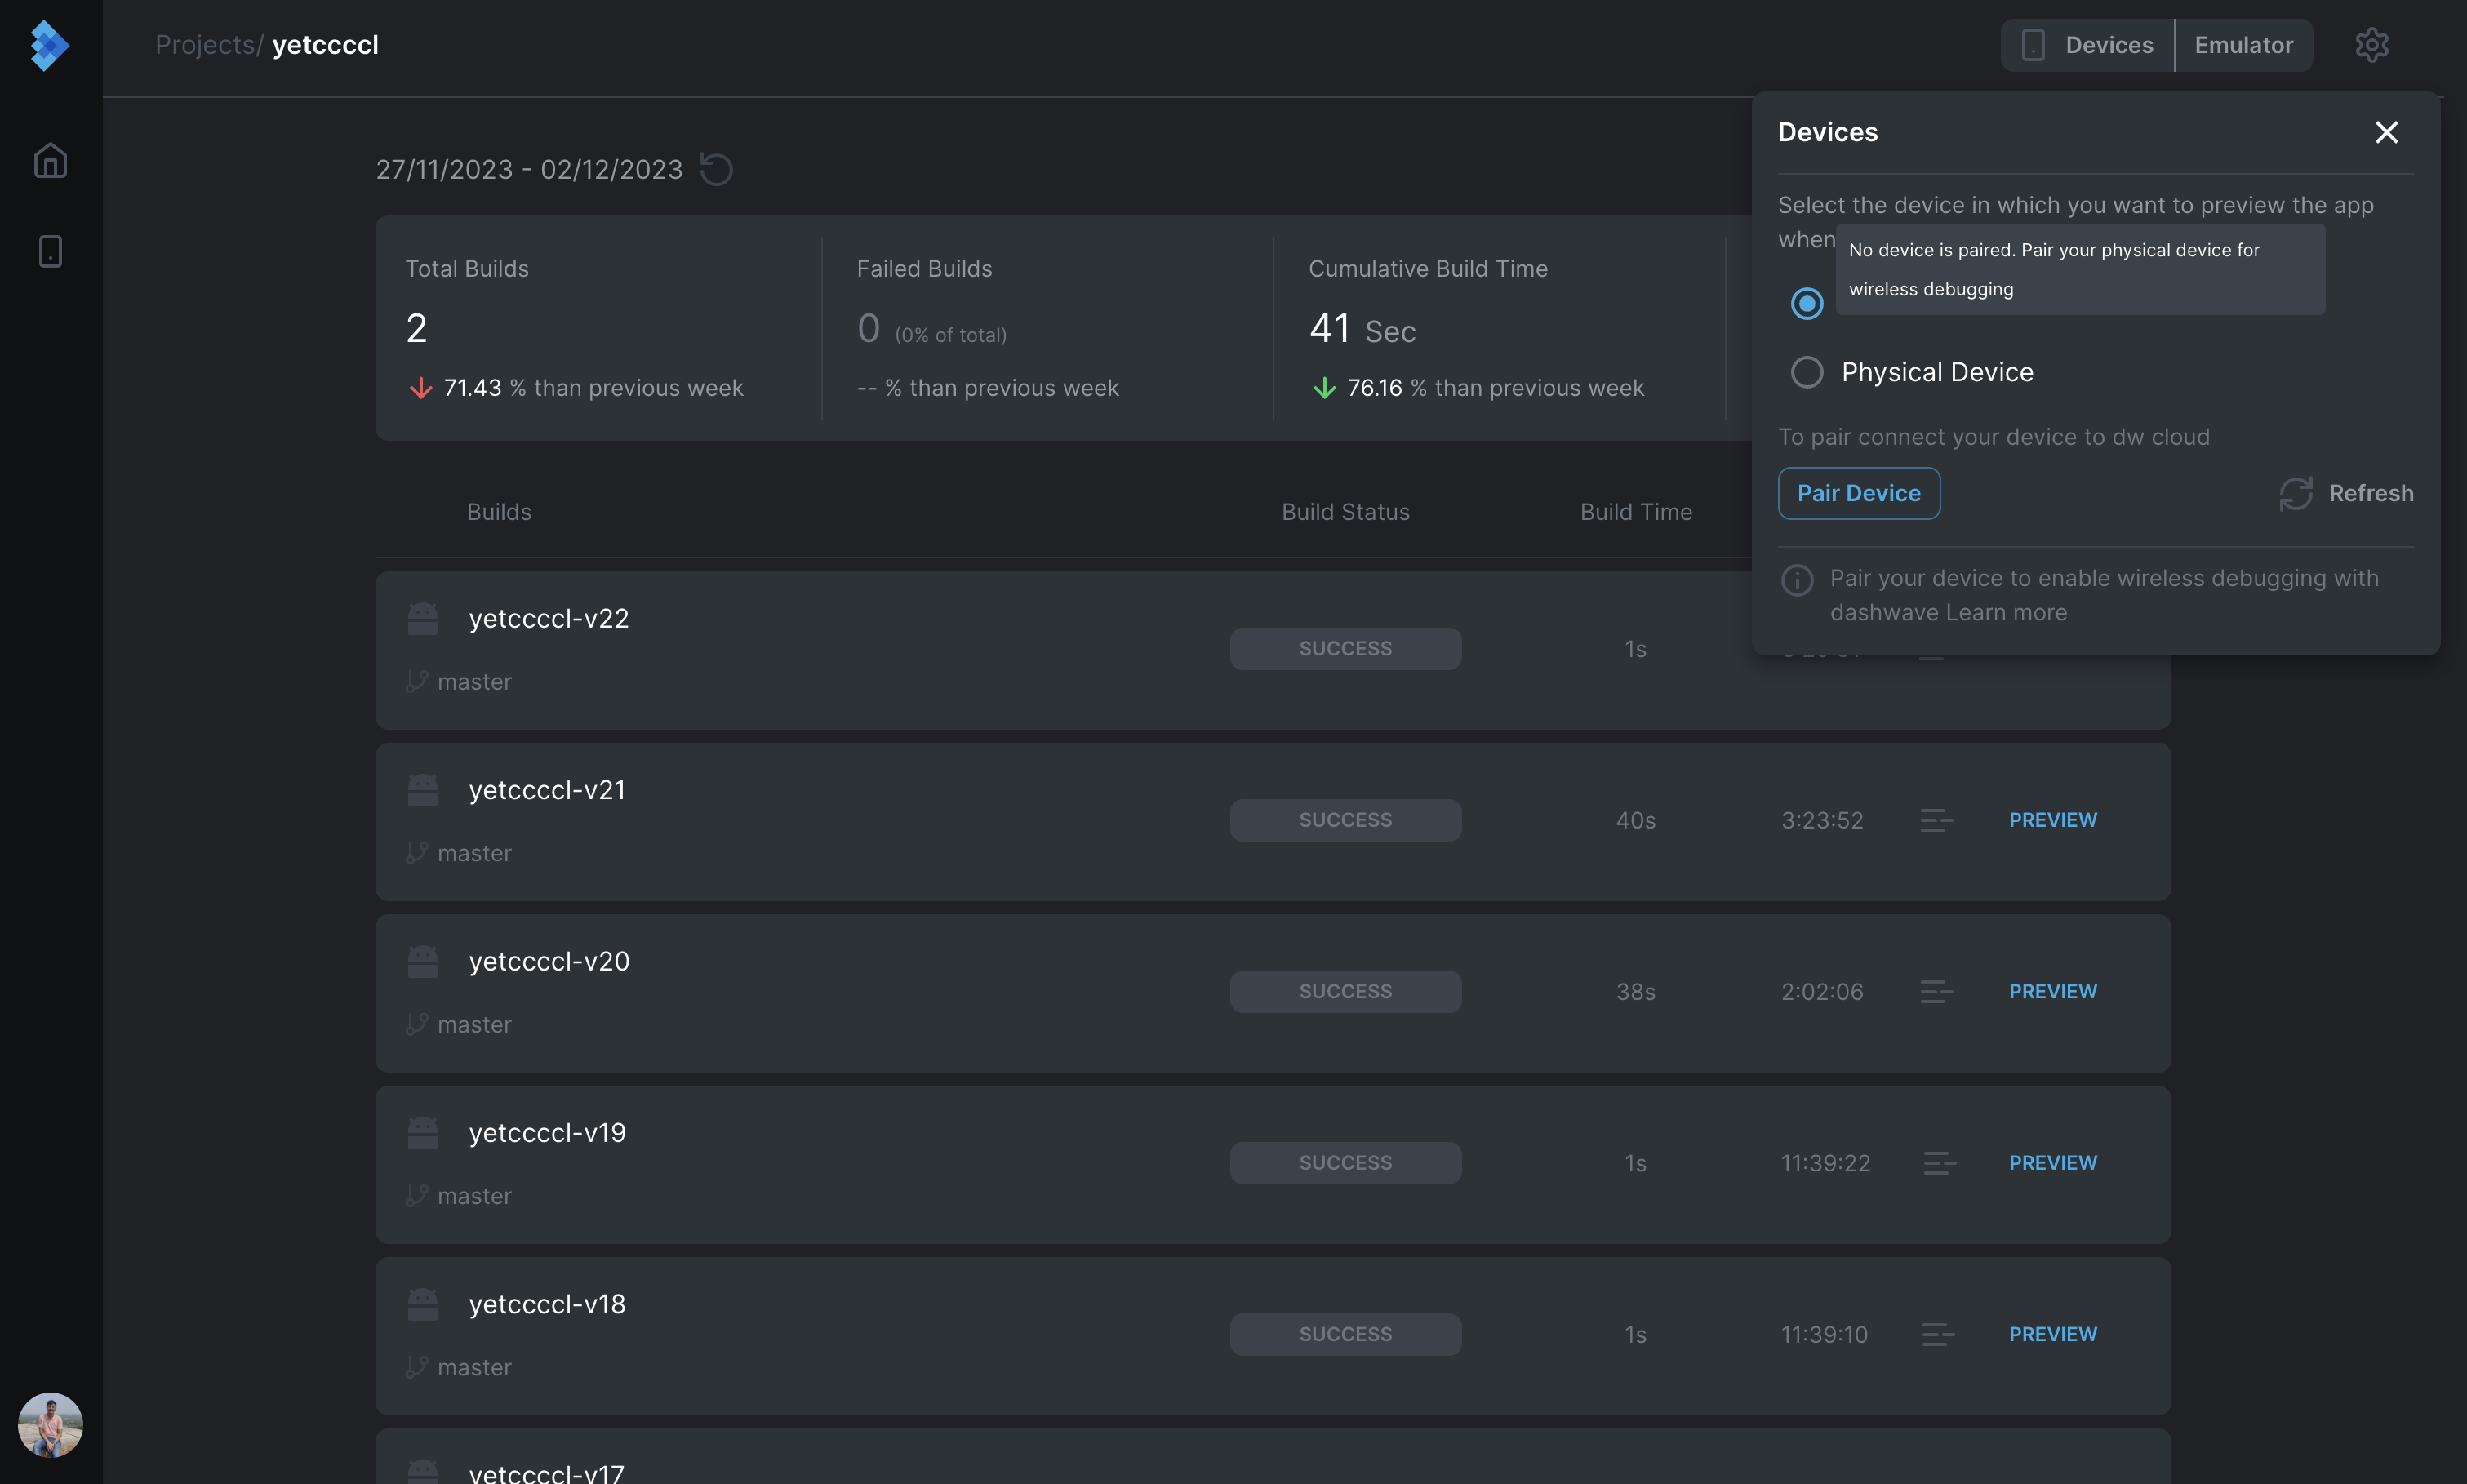
- By default, the selected option would be -
Dashwave Emulator. This is the emulator powered by Dashwave running on our cloud. To add your own physical device, click onPair Device
1.2 Setup OpenVPN Client
- When you click on
Pair Deviceas mentioned in last step, the following screen appears.
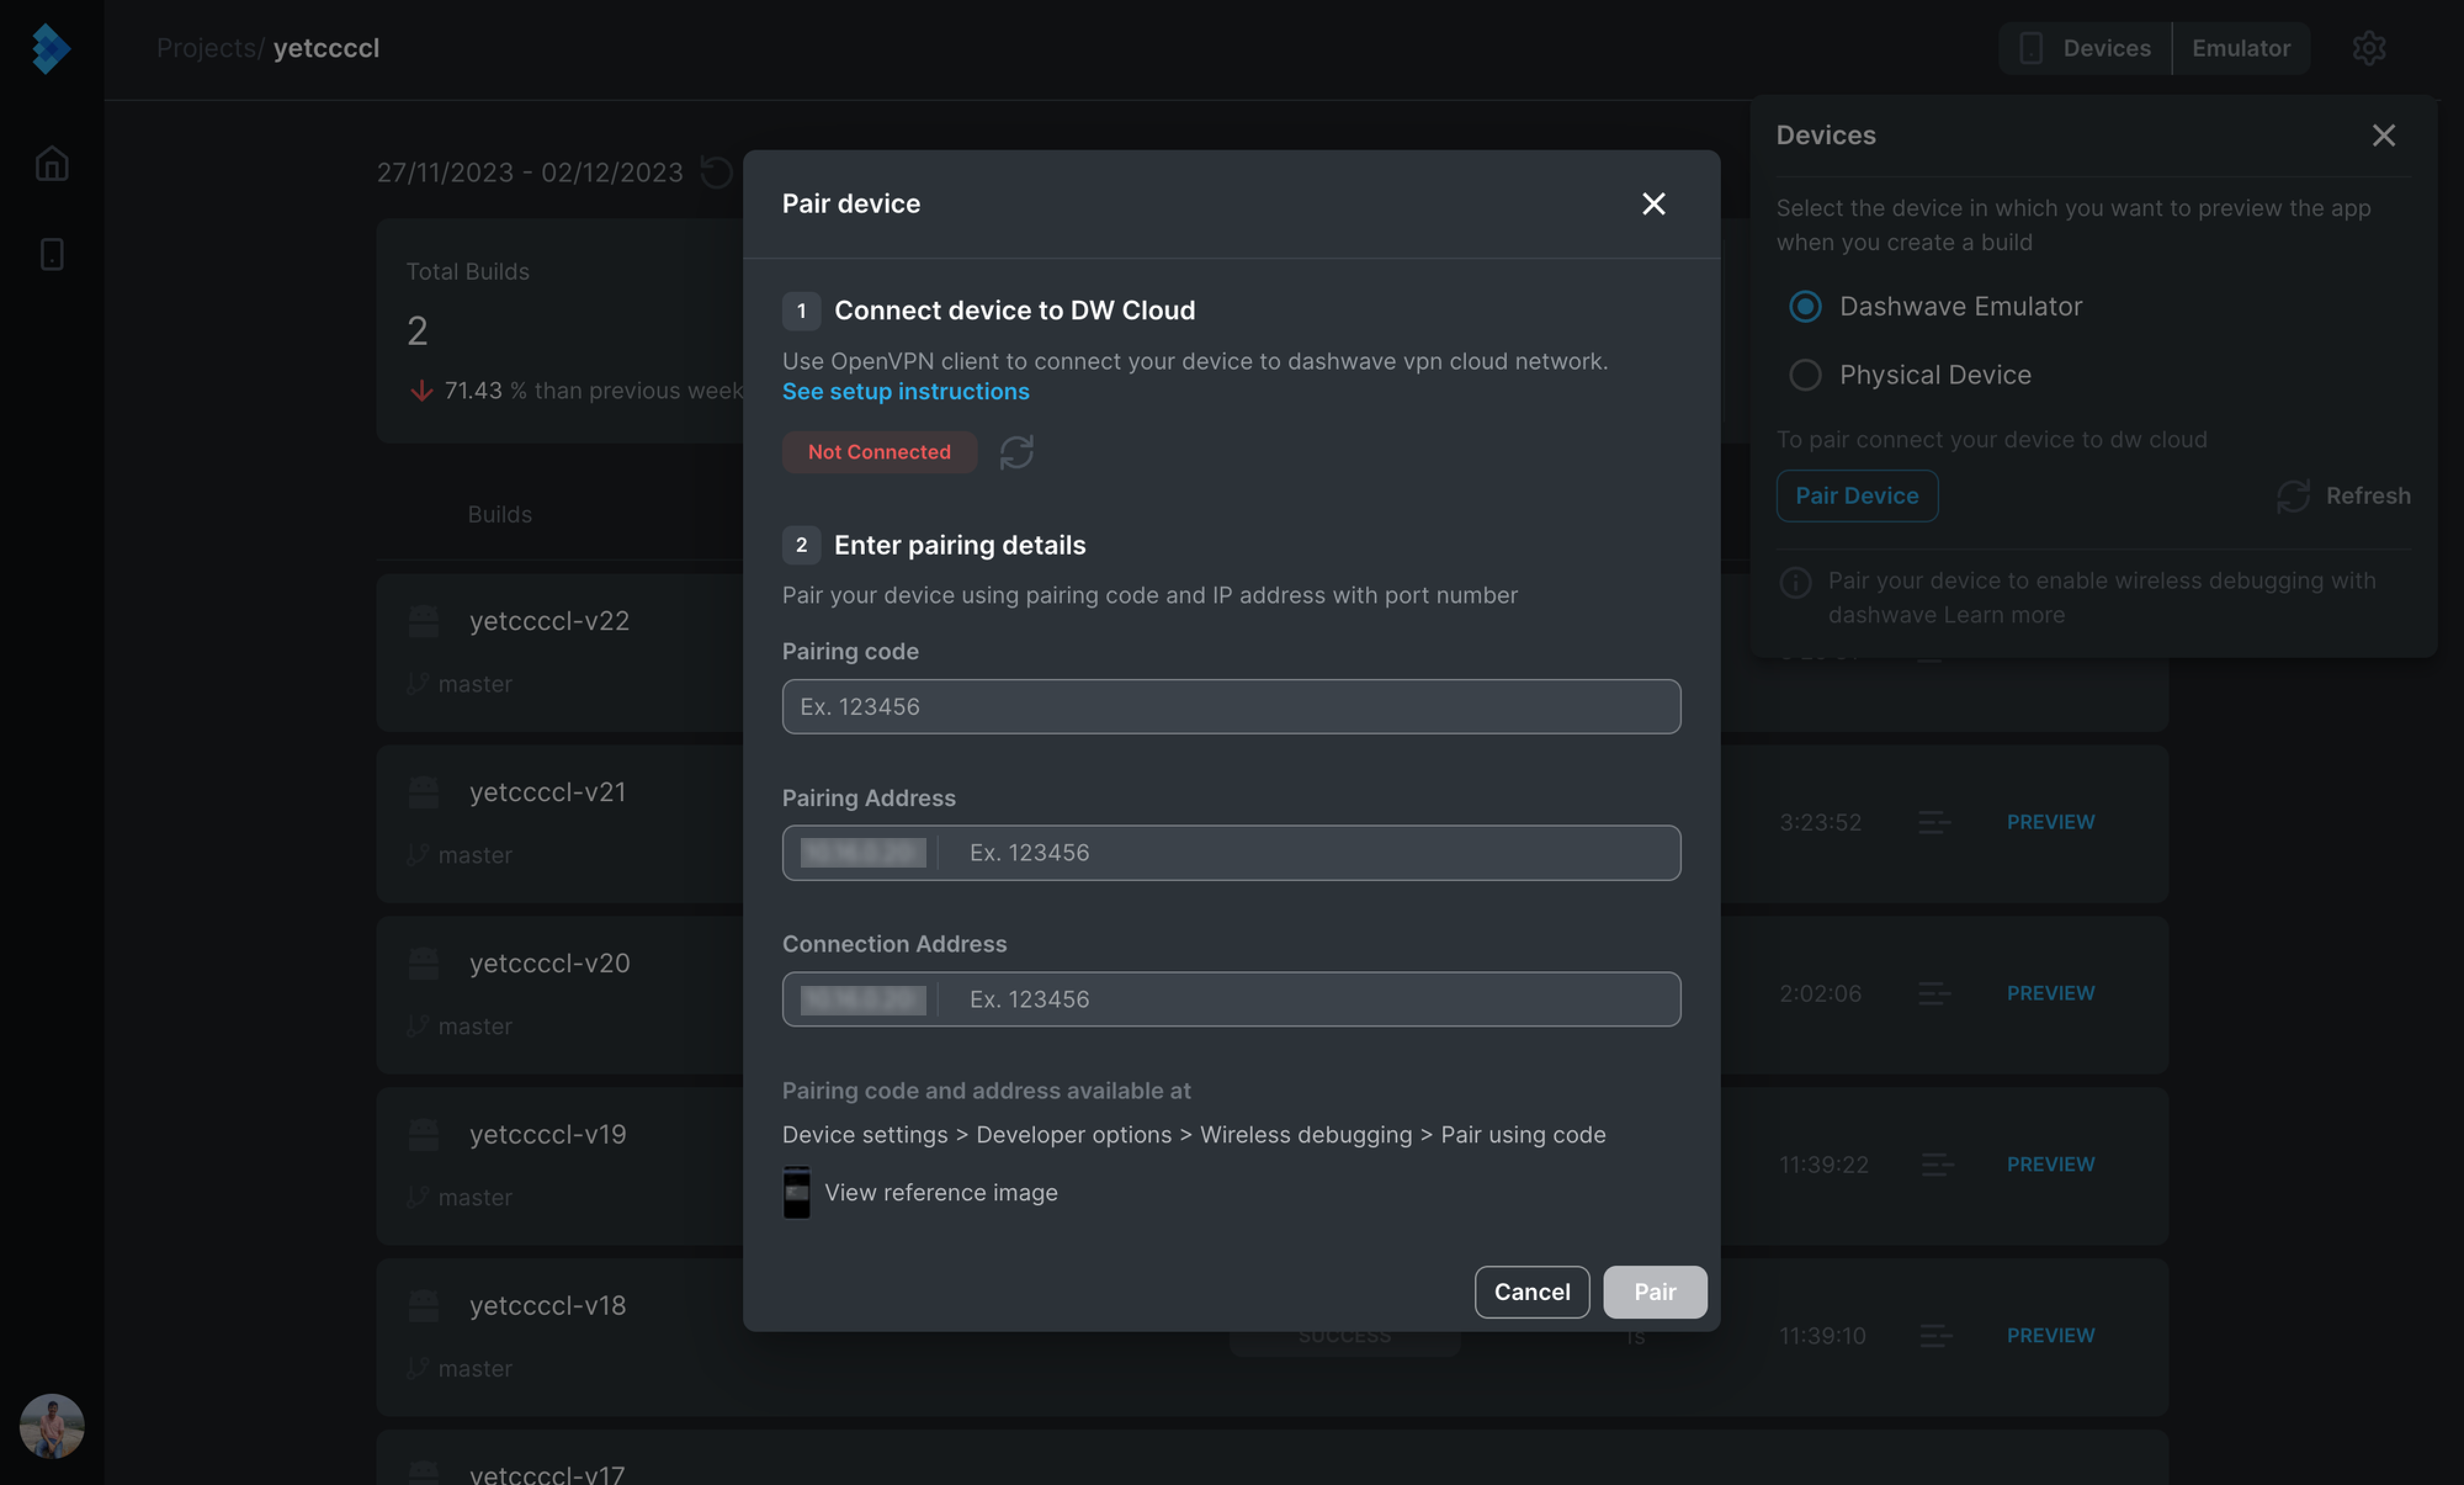
- Before pairing a device, it is important to setup OpenVPN client on the device you want to pair. To setup, click on -
See setup instructions. The following screen should appear.
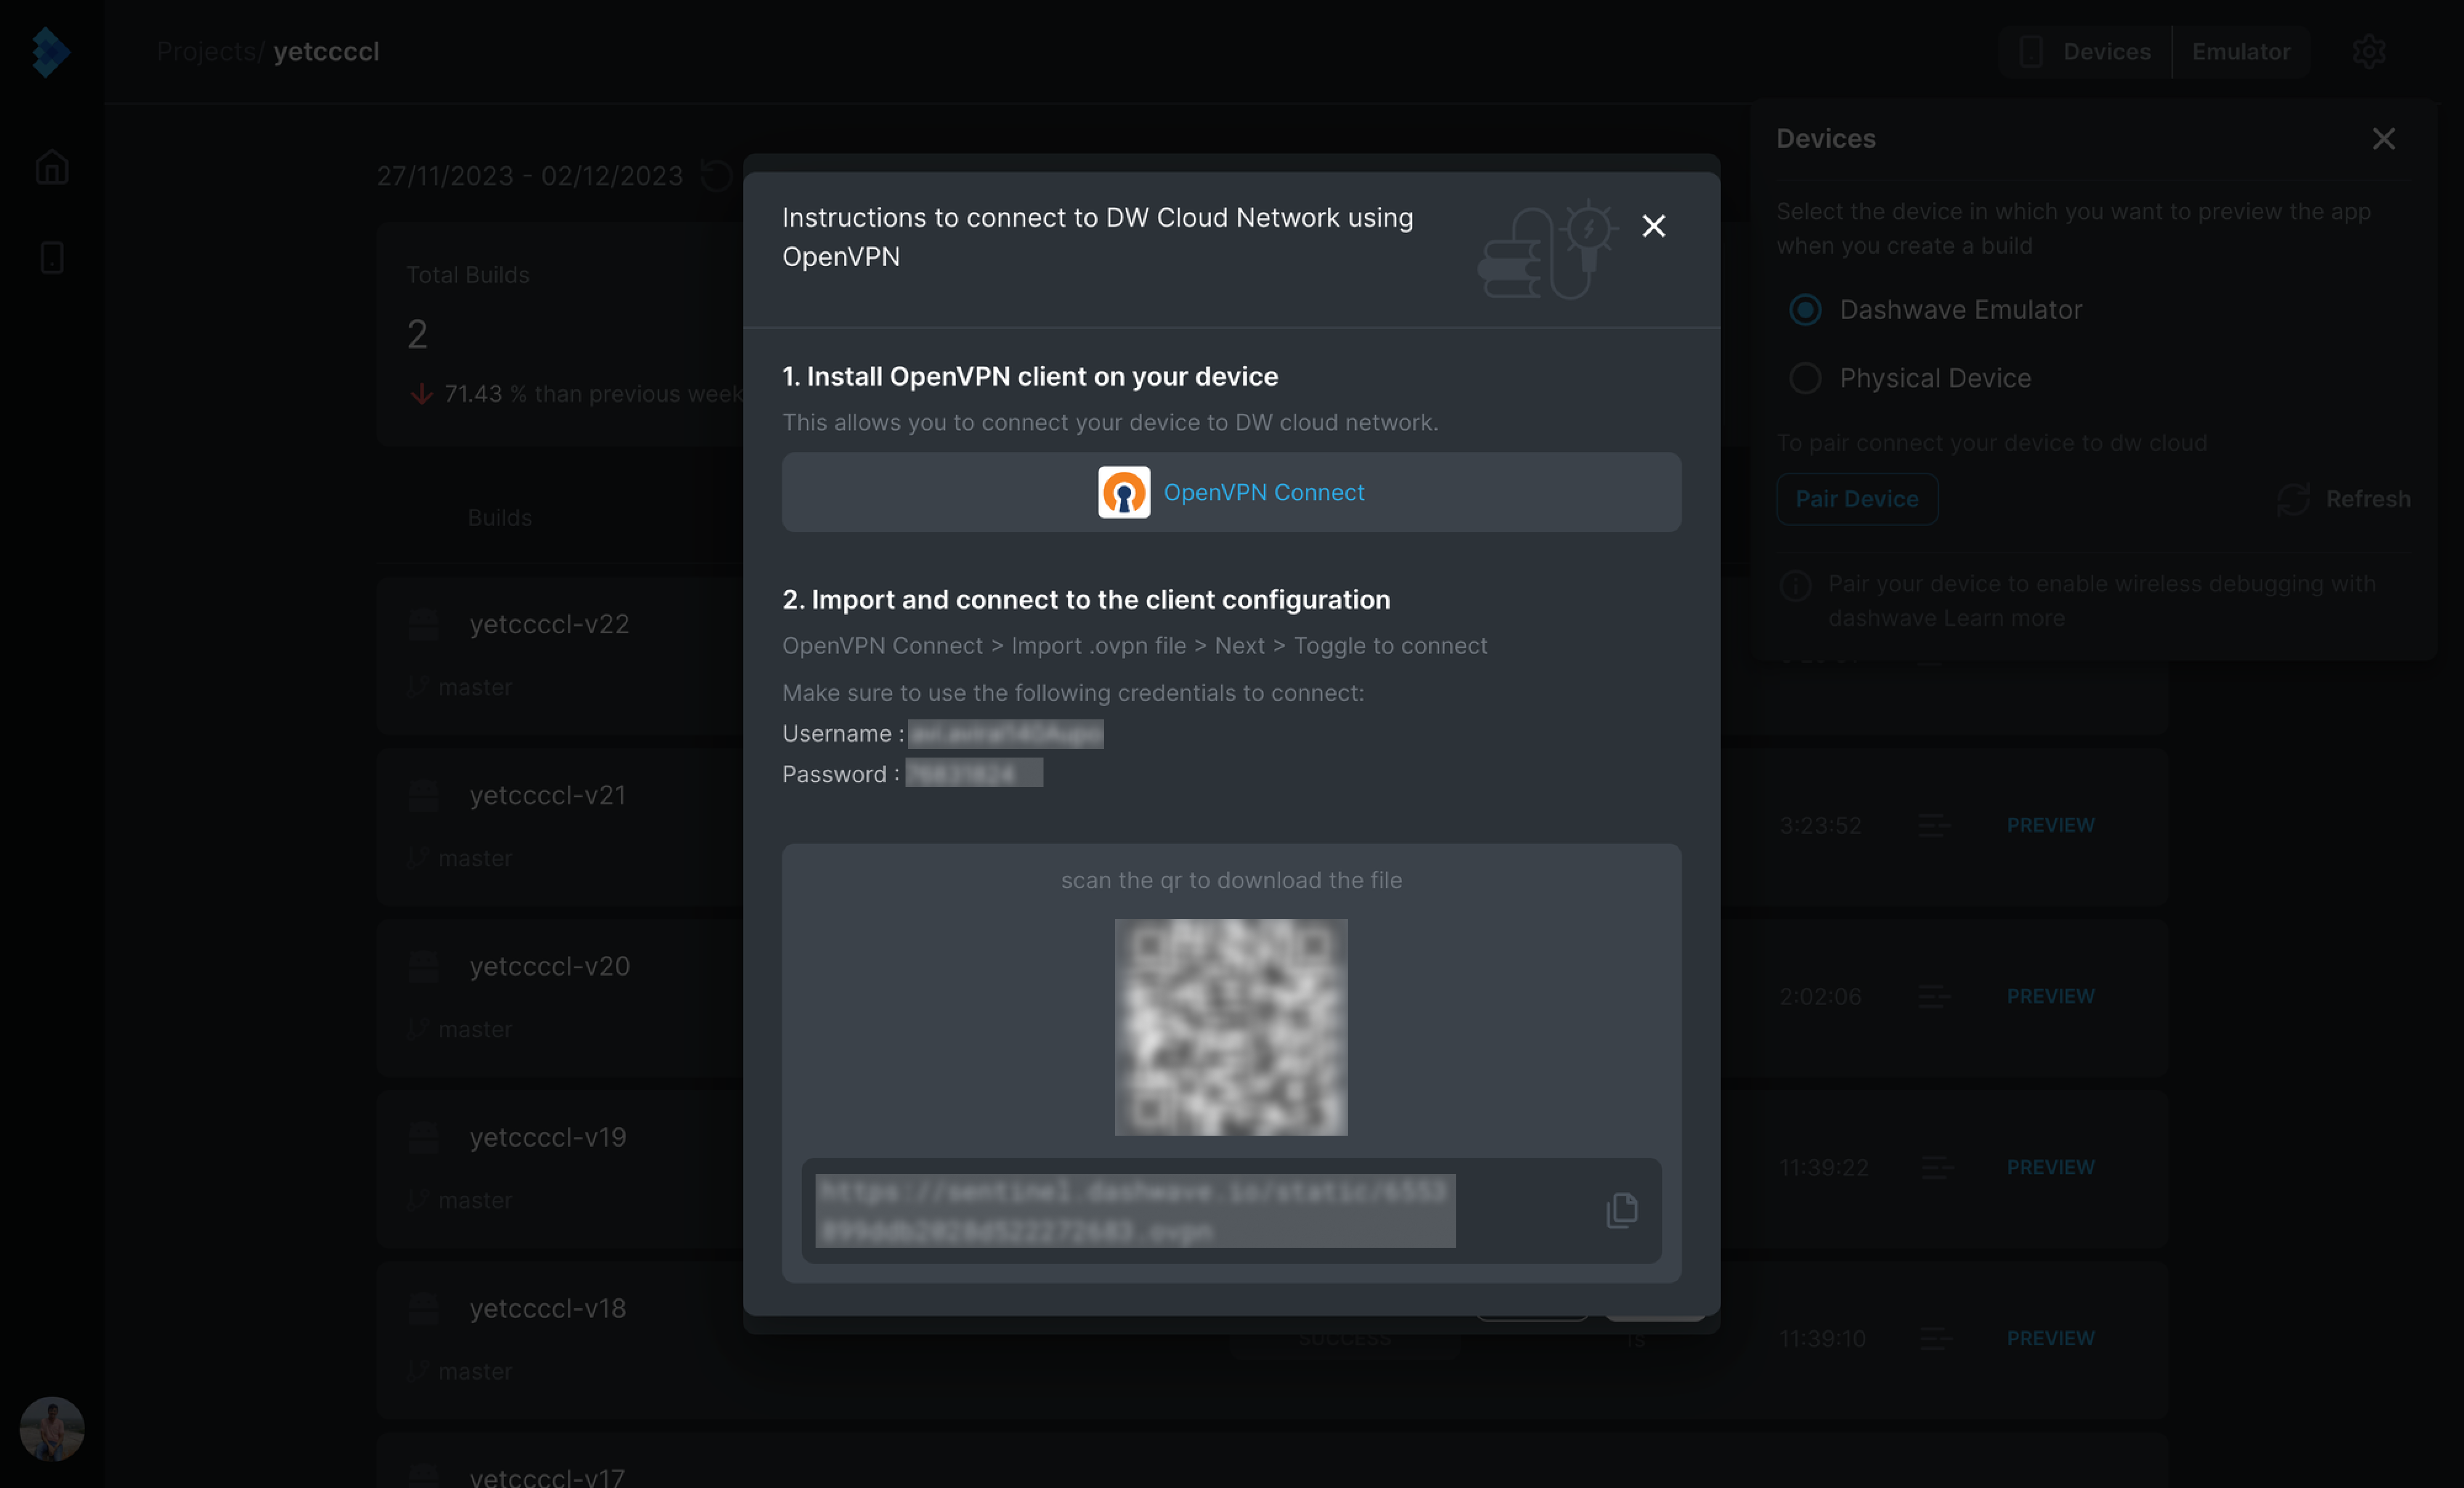
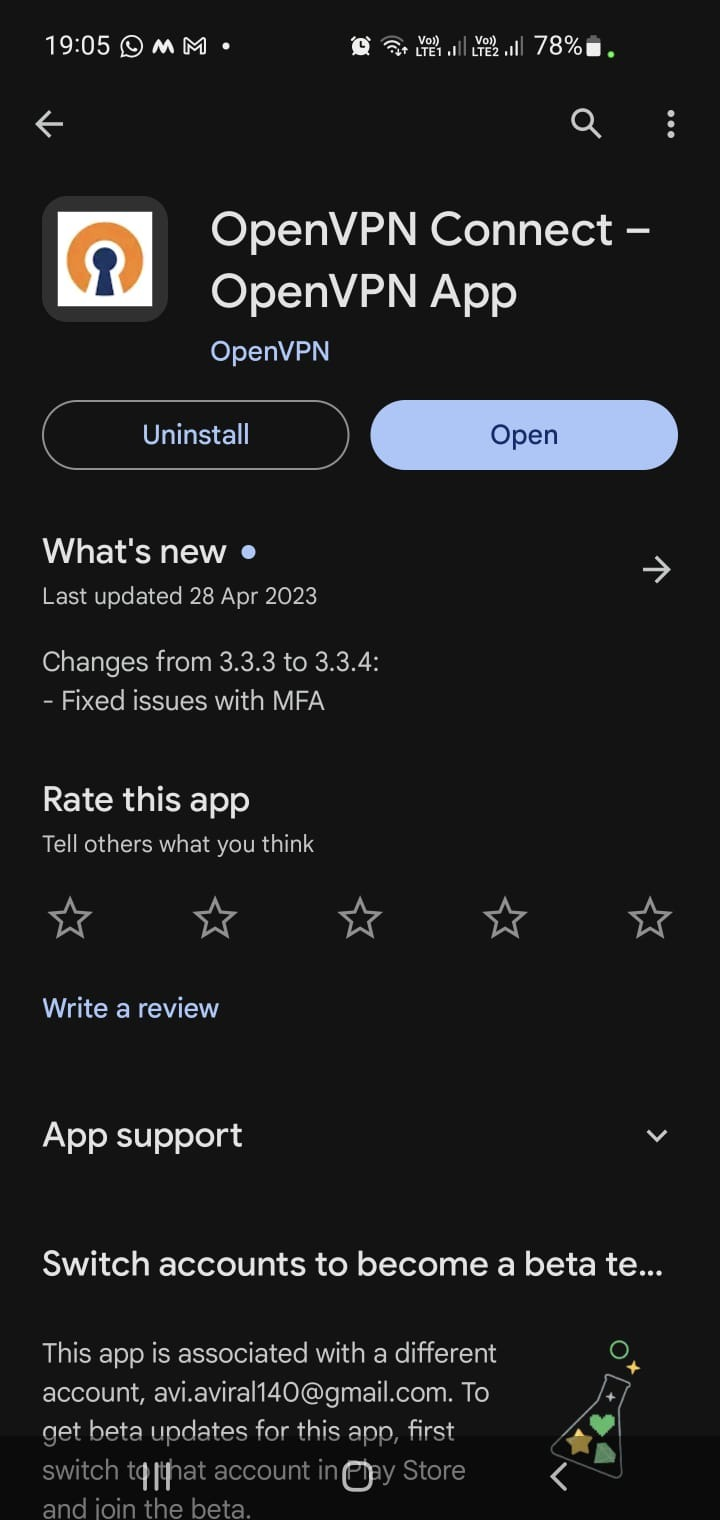
- Install OpenVPN client from the Google Play Store on your android device.
- Scan the QR on your screen using your android device. This should direct you to a link that would download the VPN configuration file on your device (.ovpn file).
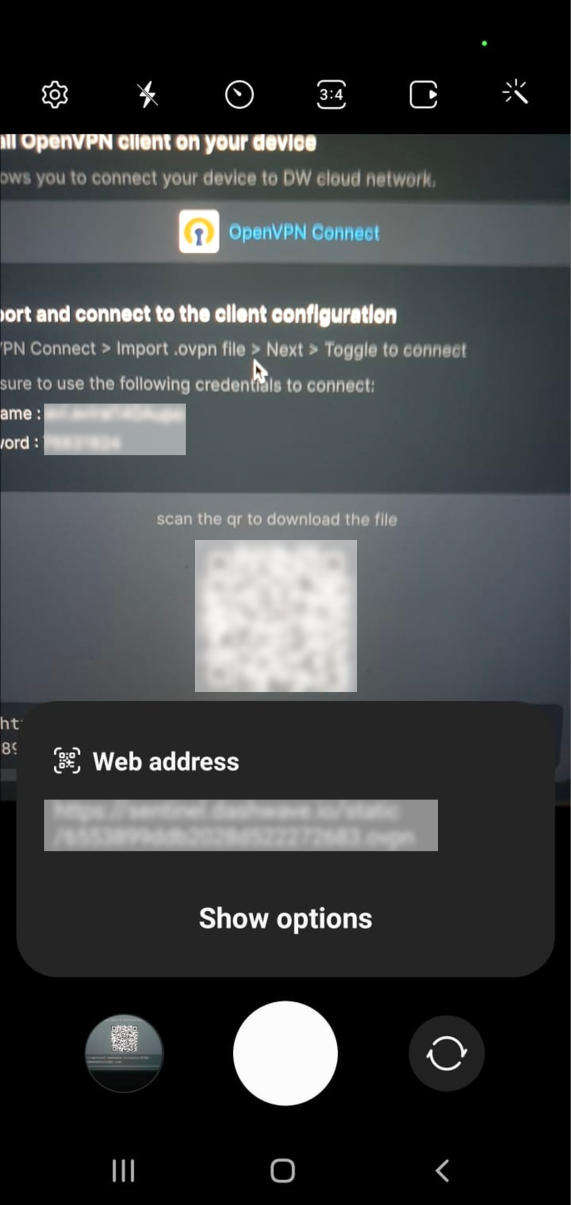
Incase there is some issue with your camera, you can copy the link provided below the QR code from your laptop to mobile device, and download file manually using that link.
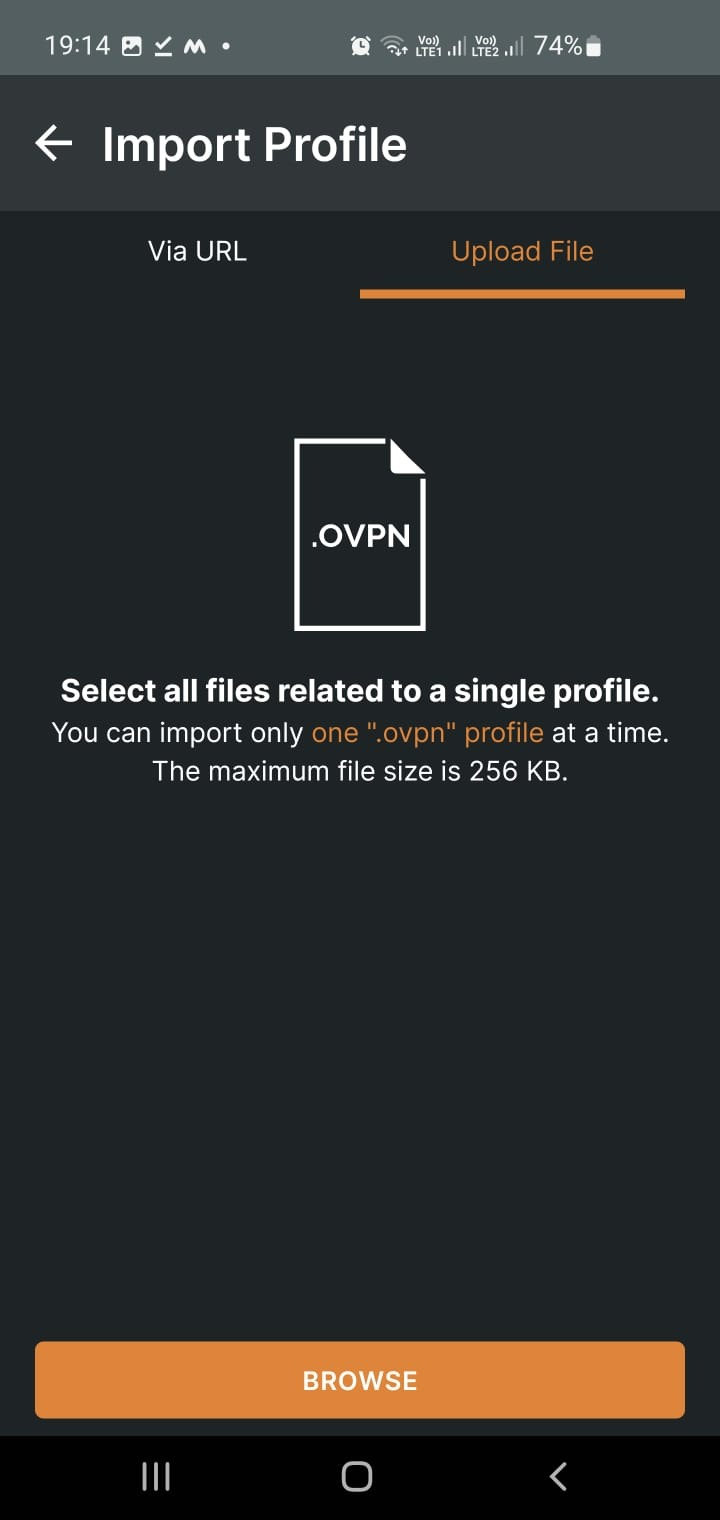
- Open this downloaded .ovpn file, your phone should ask you the software using which you want to open this file. Select OpenVPN client.
In case you are not able to directly open this .ovpn file using OpenVPN Client app, open the app manually, and go to - Import Profile option from the side menu. Select Upload File and Browse. Select the downloaded file and you can proceed to the next step.

-
The following screen appears. Enter the username and password provided on the console screen above the QR code. Enable save password, and click on
ConnectYour device should connect to the VPN successfully. Make sure this connection remains on.noteNote: Please remember this password, as this may come handy to reconnect later on. You can also find this password by navigating to the VPN setup instructions, if you want to find this later on. This password remains same in the scope of the user


You can toggle the on/off button for this connection to connect and disconnect. You don’t need to setup the VPN every time you want to connect your device to Dashwave. This is a one time process for each android device for each user. If you are experience any issues in connecting, please contact us at support@dashwave.io.
-
Close, the VPN setup instruction modal on console. Refresh the VPN Connection Status, and it should change it’s state to
Connected. The next step should be enabled now.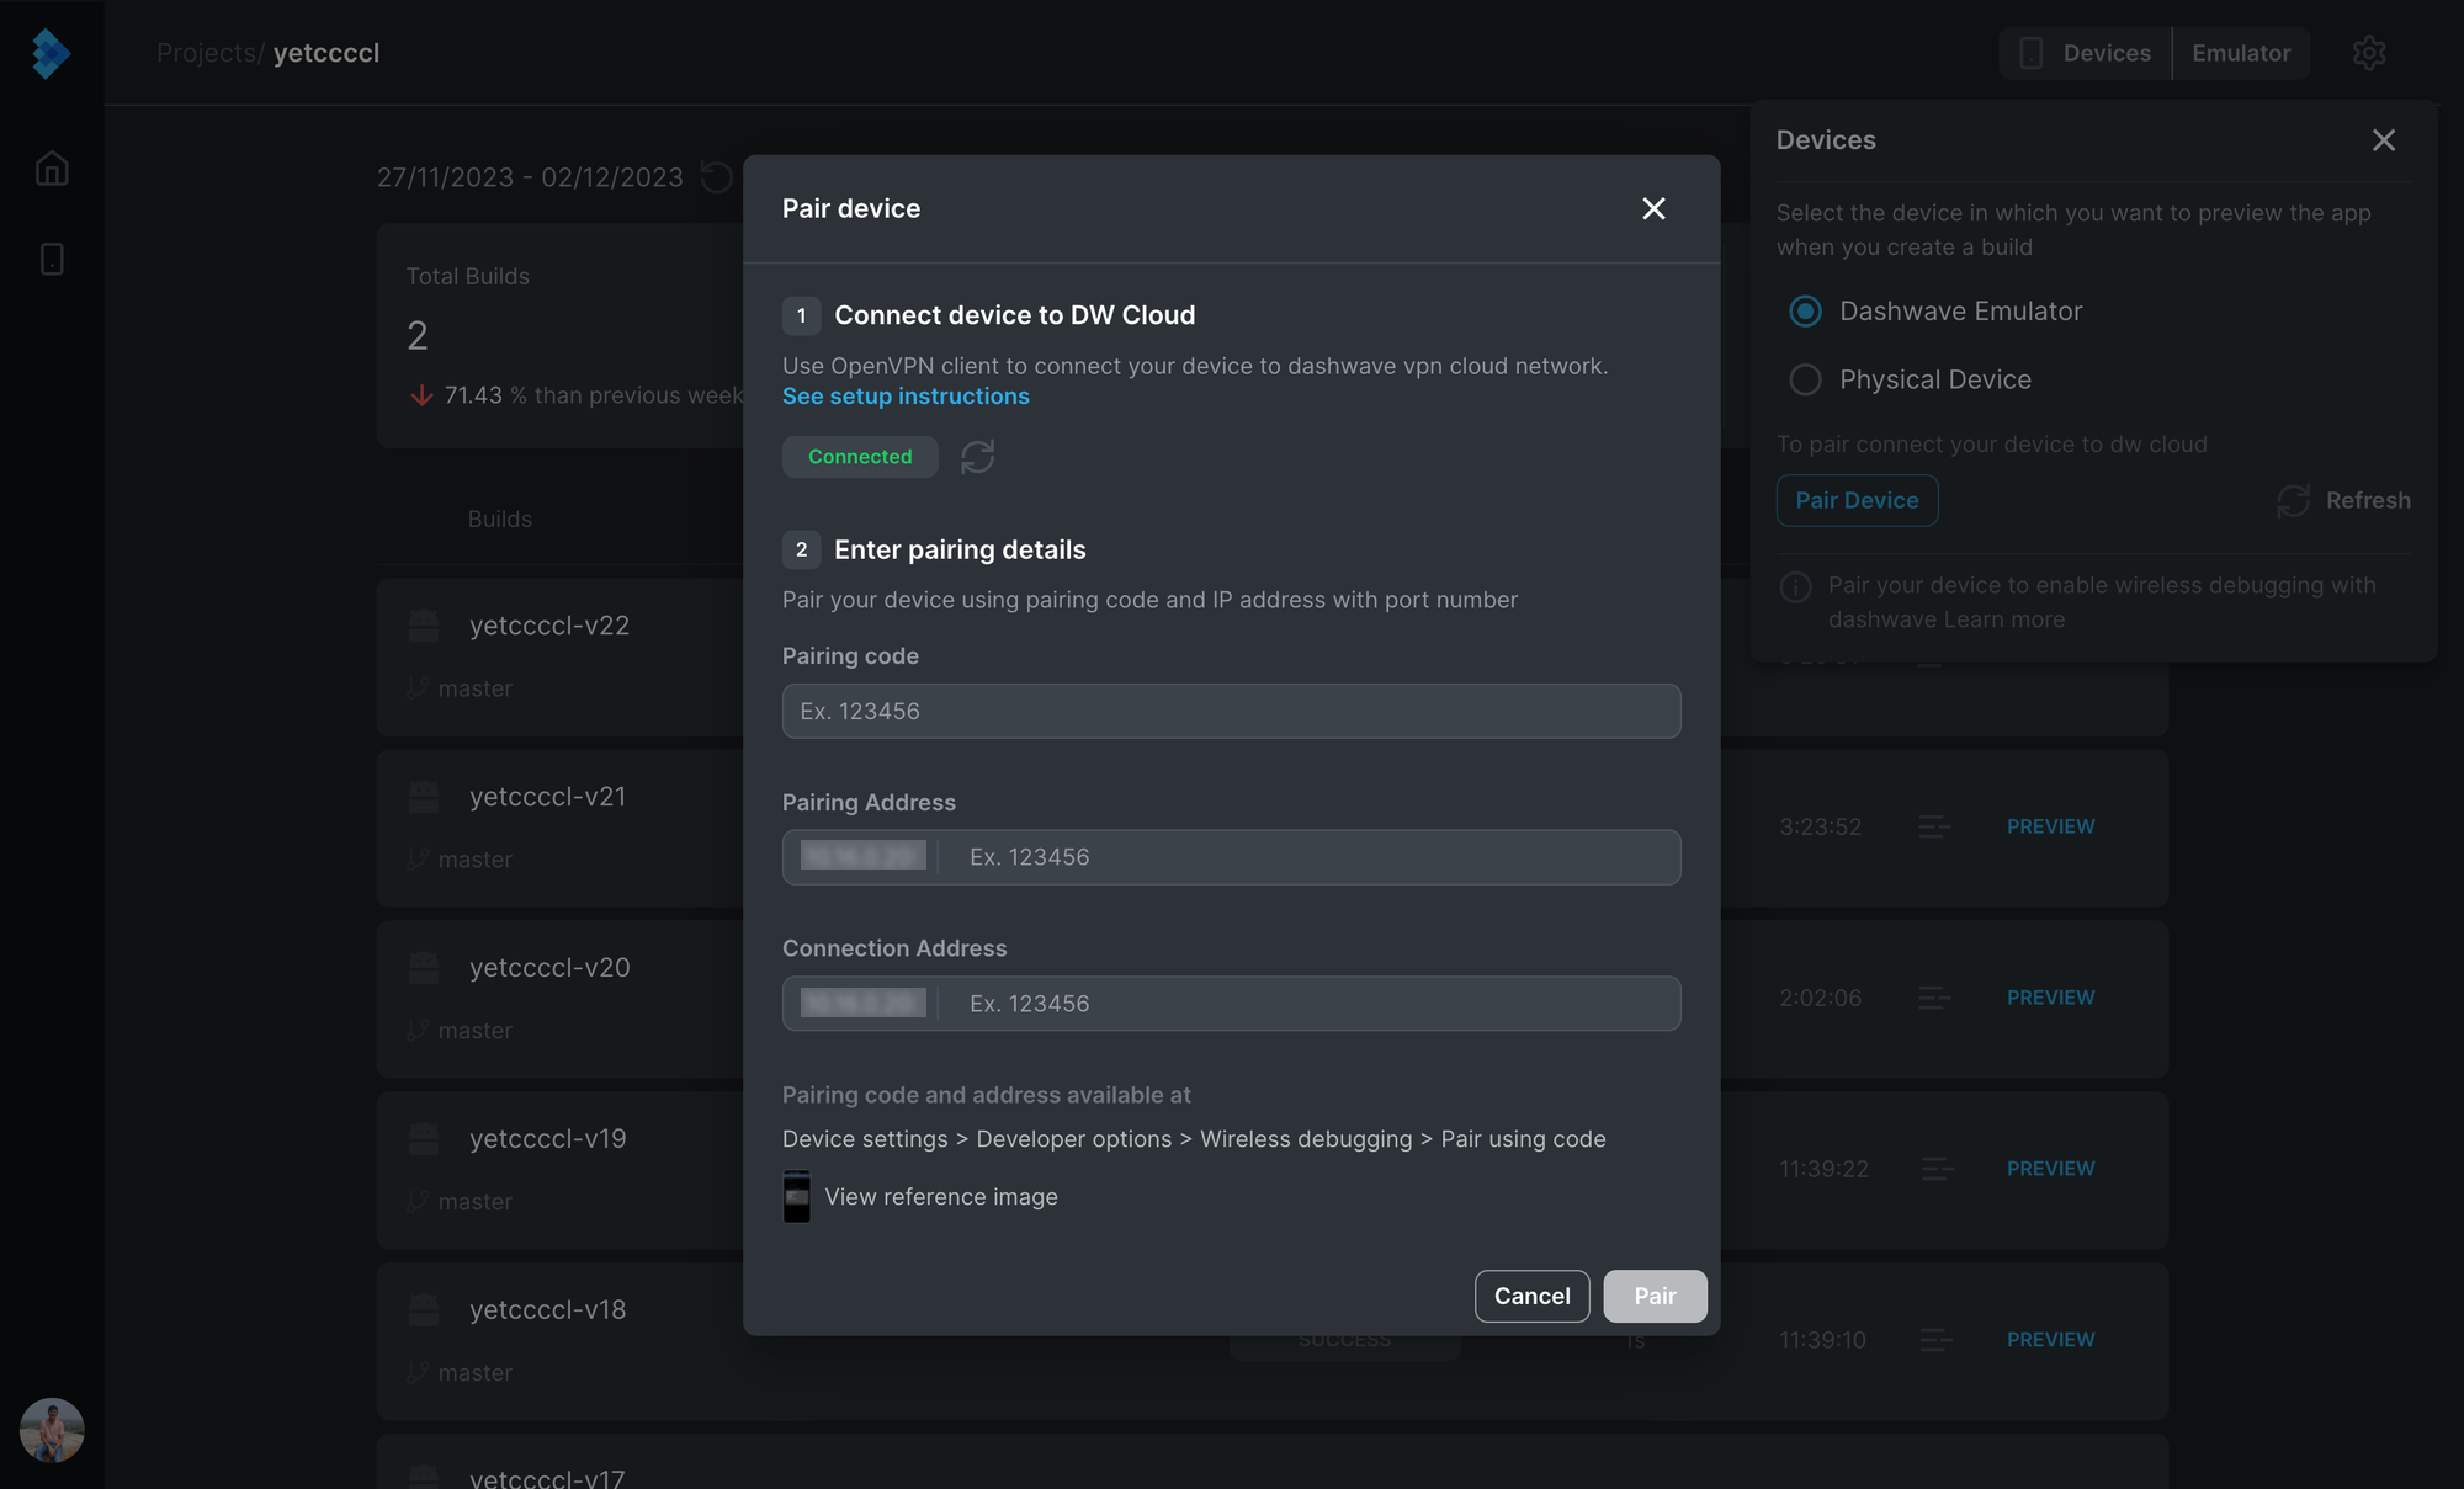
1.3 Pair Device from Developer Settings - Wireless Debugging
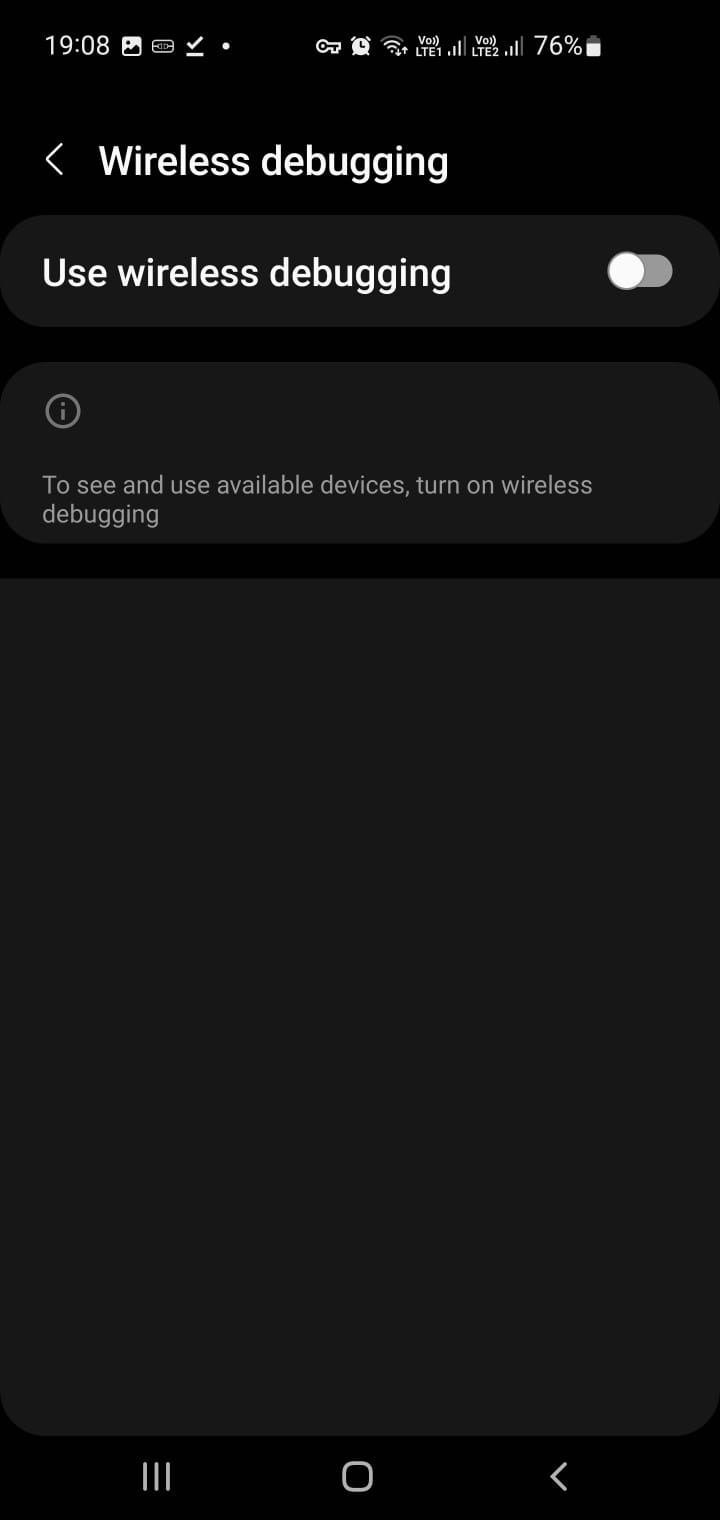
- Enable developer settings on your phone and navigate to wireless debugging. Turn on wireless debugging.
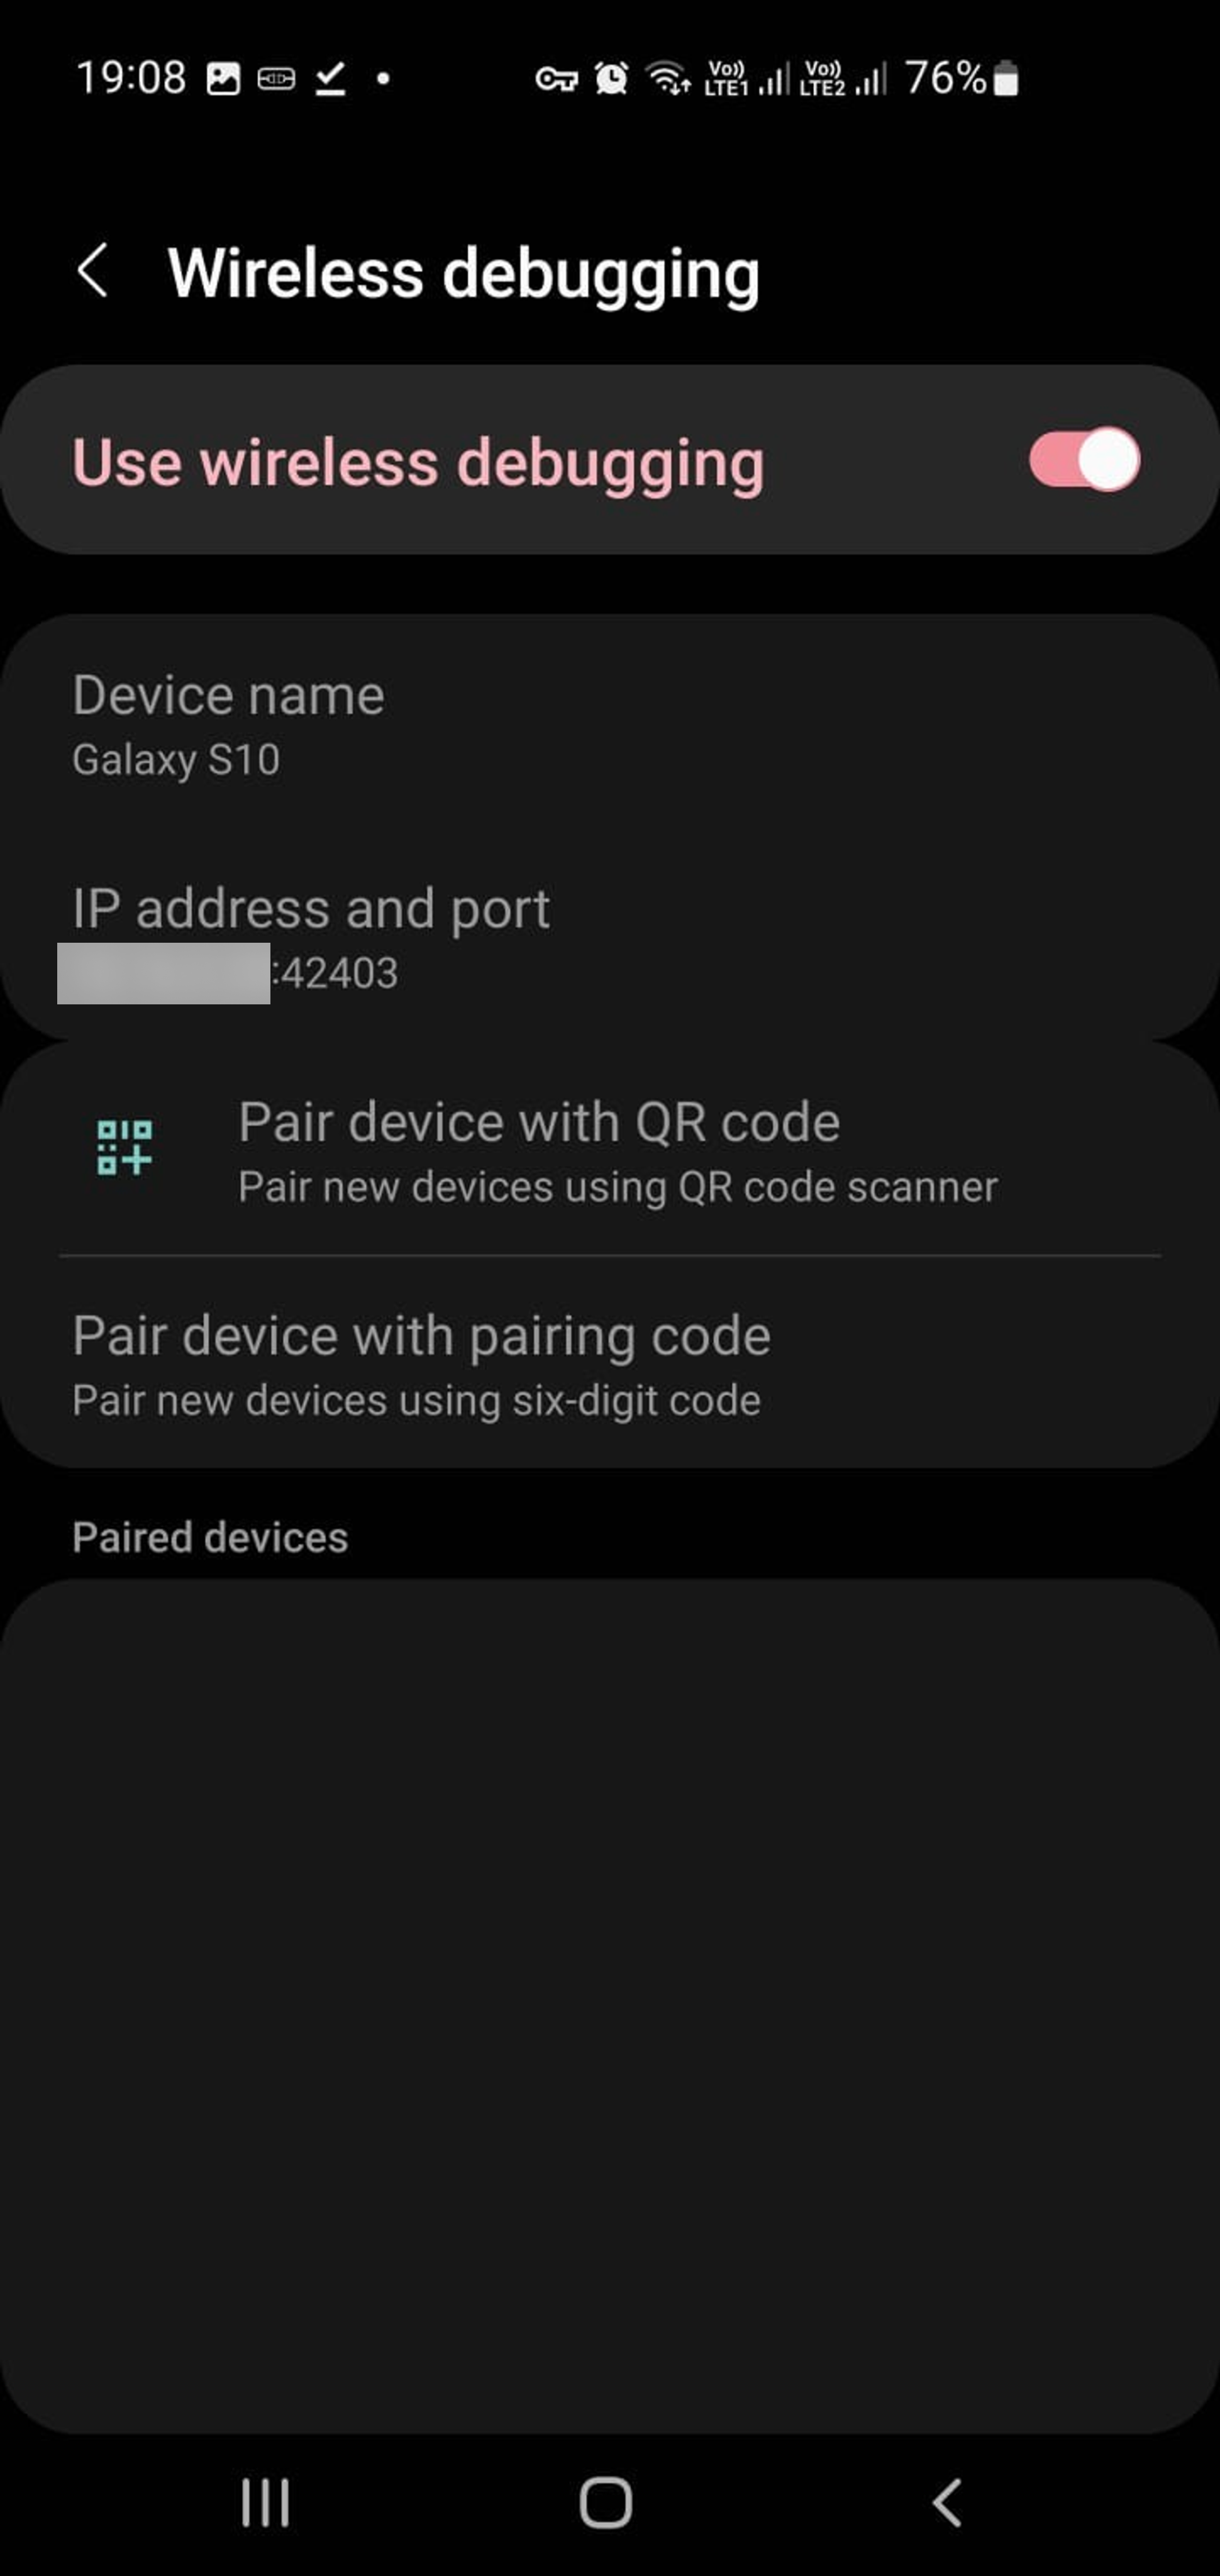
- Select -
Pair device with pairing code. And fill in the details on console, and click onPair
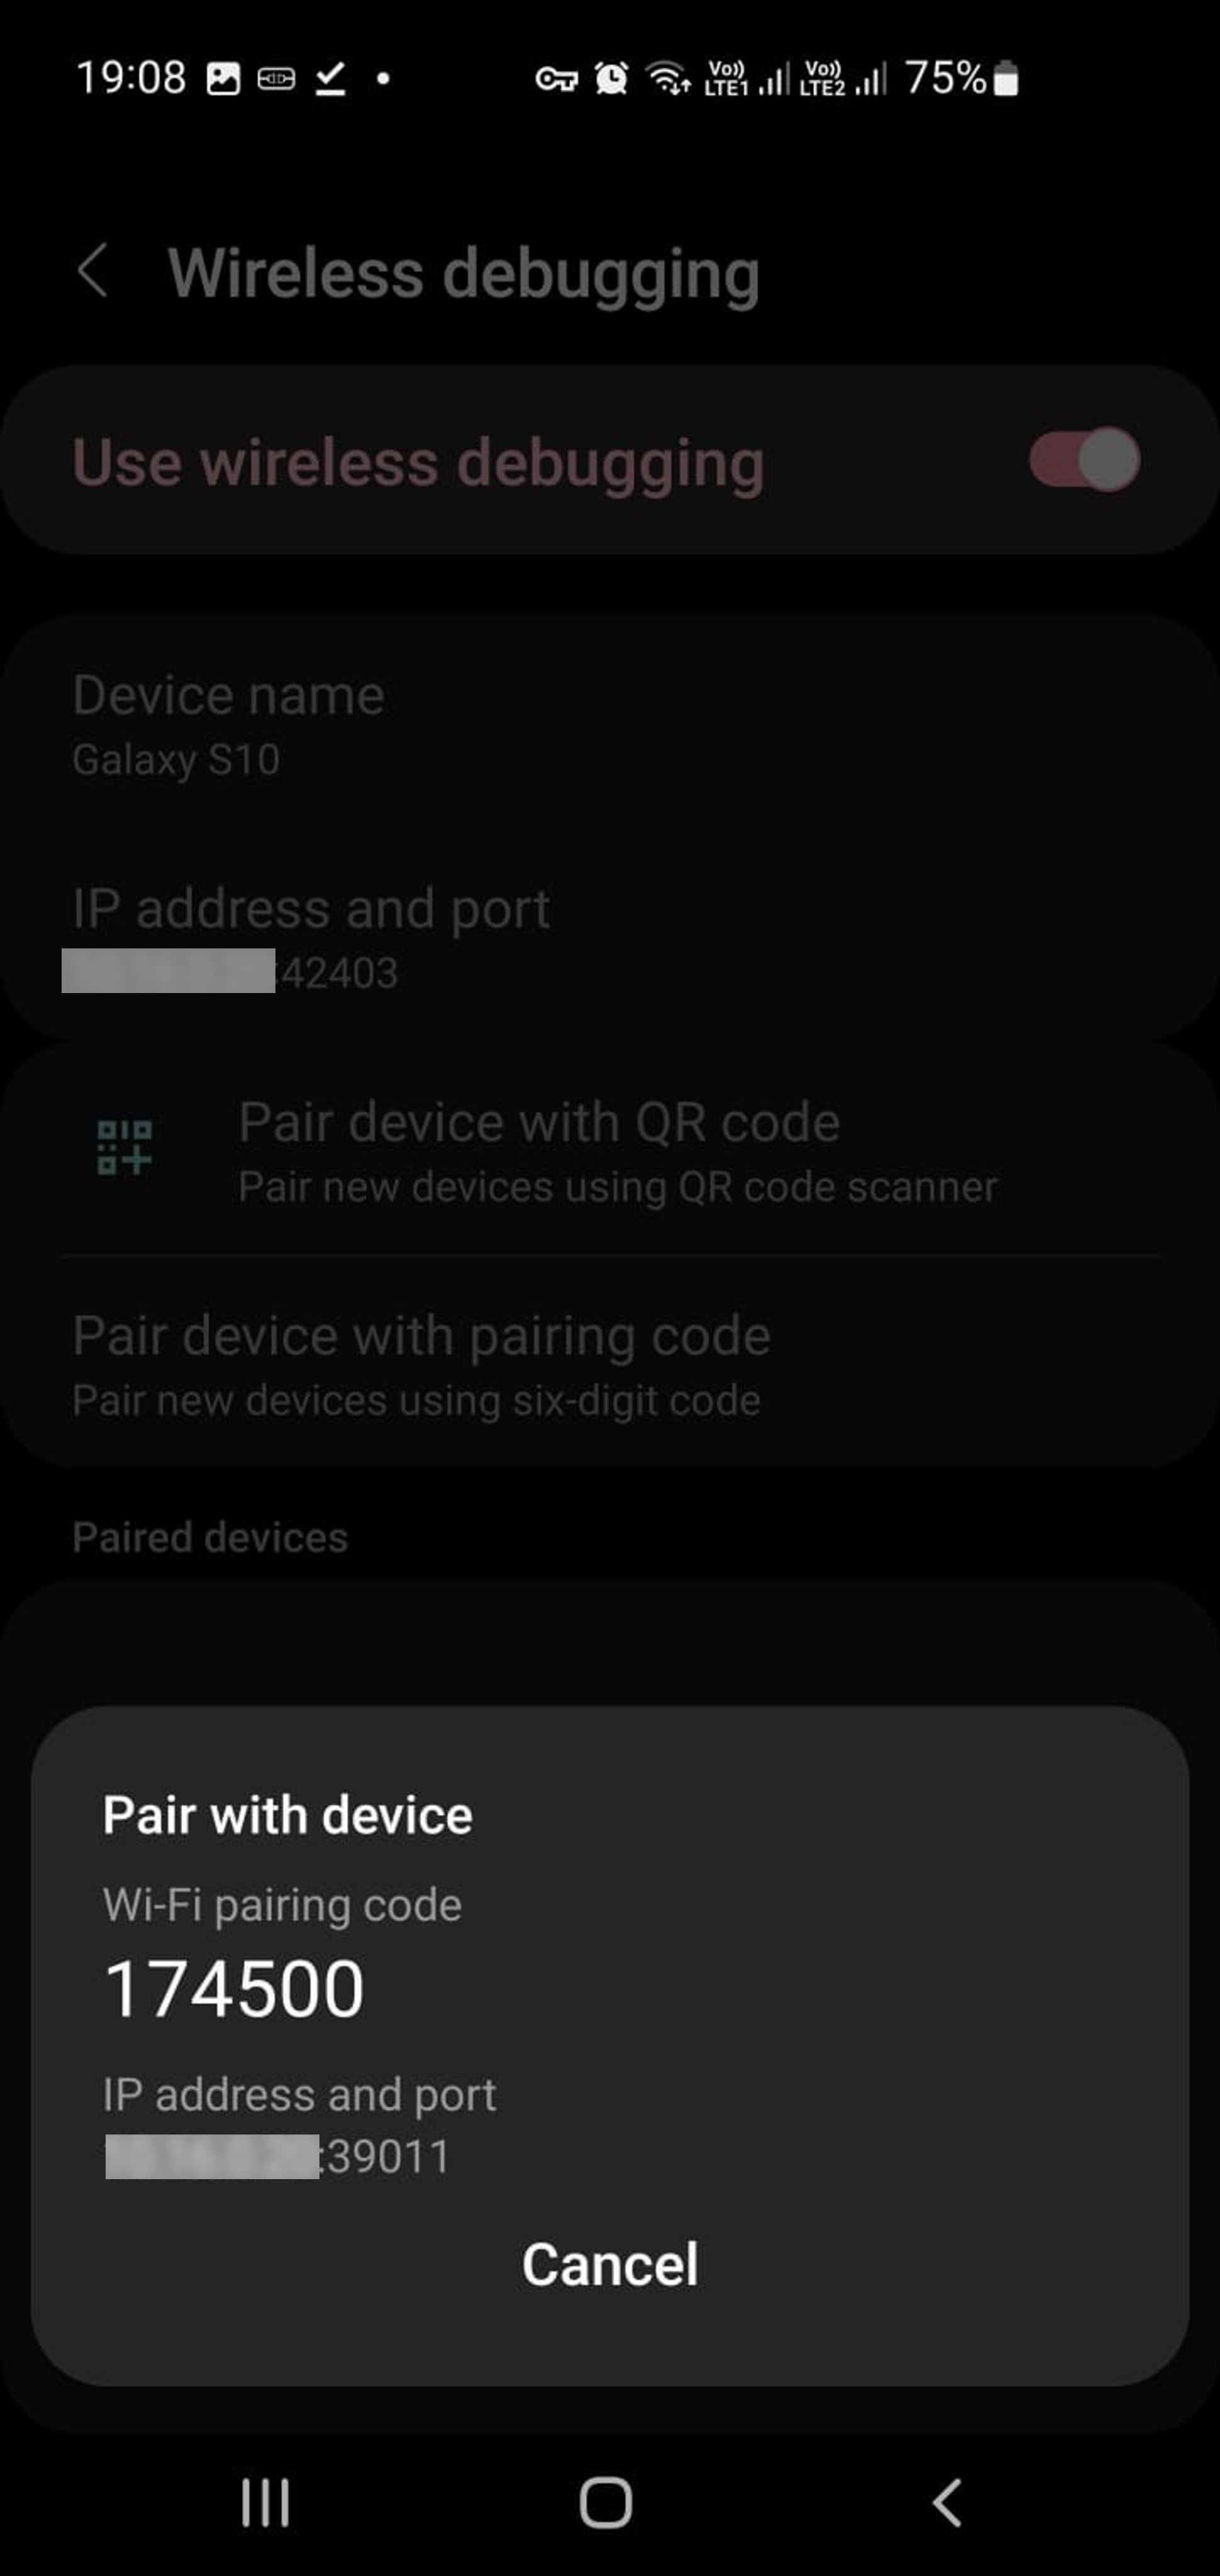
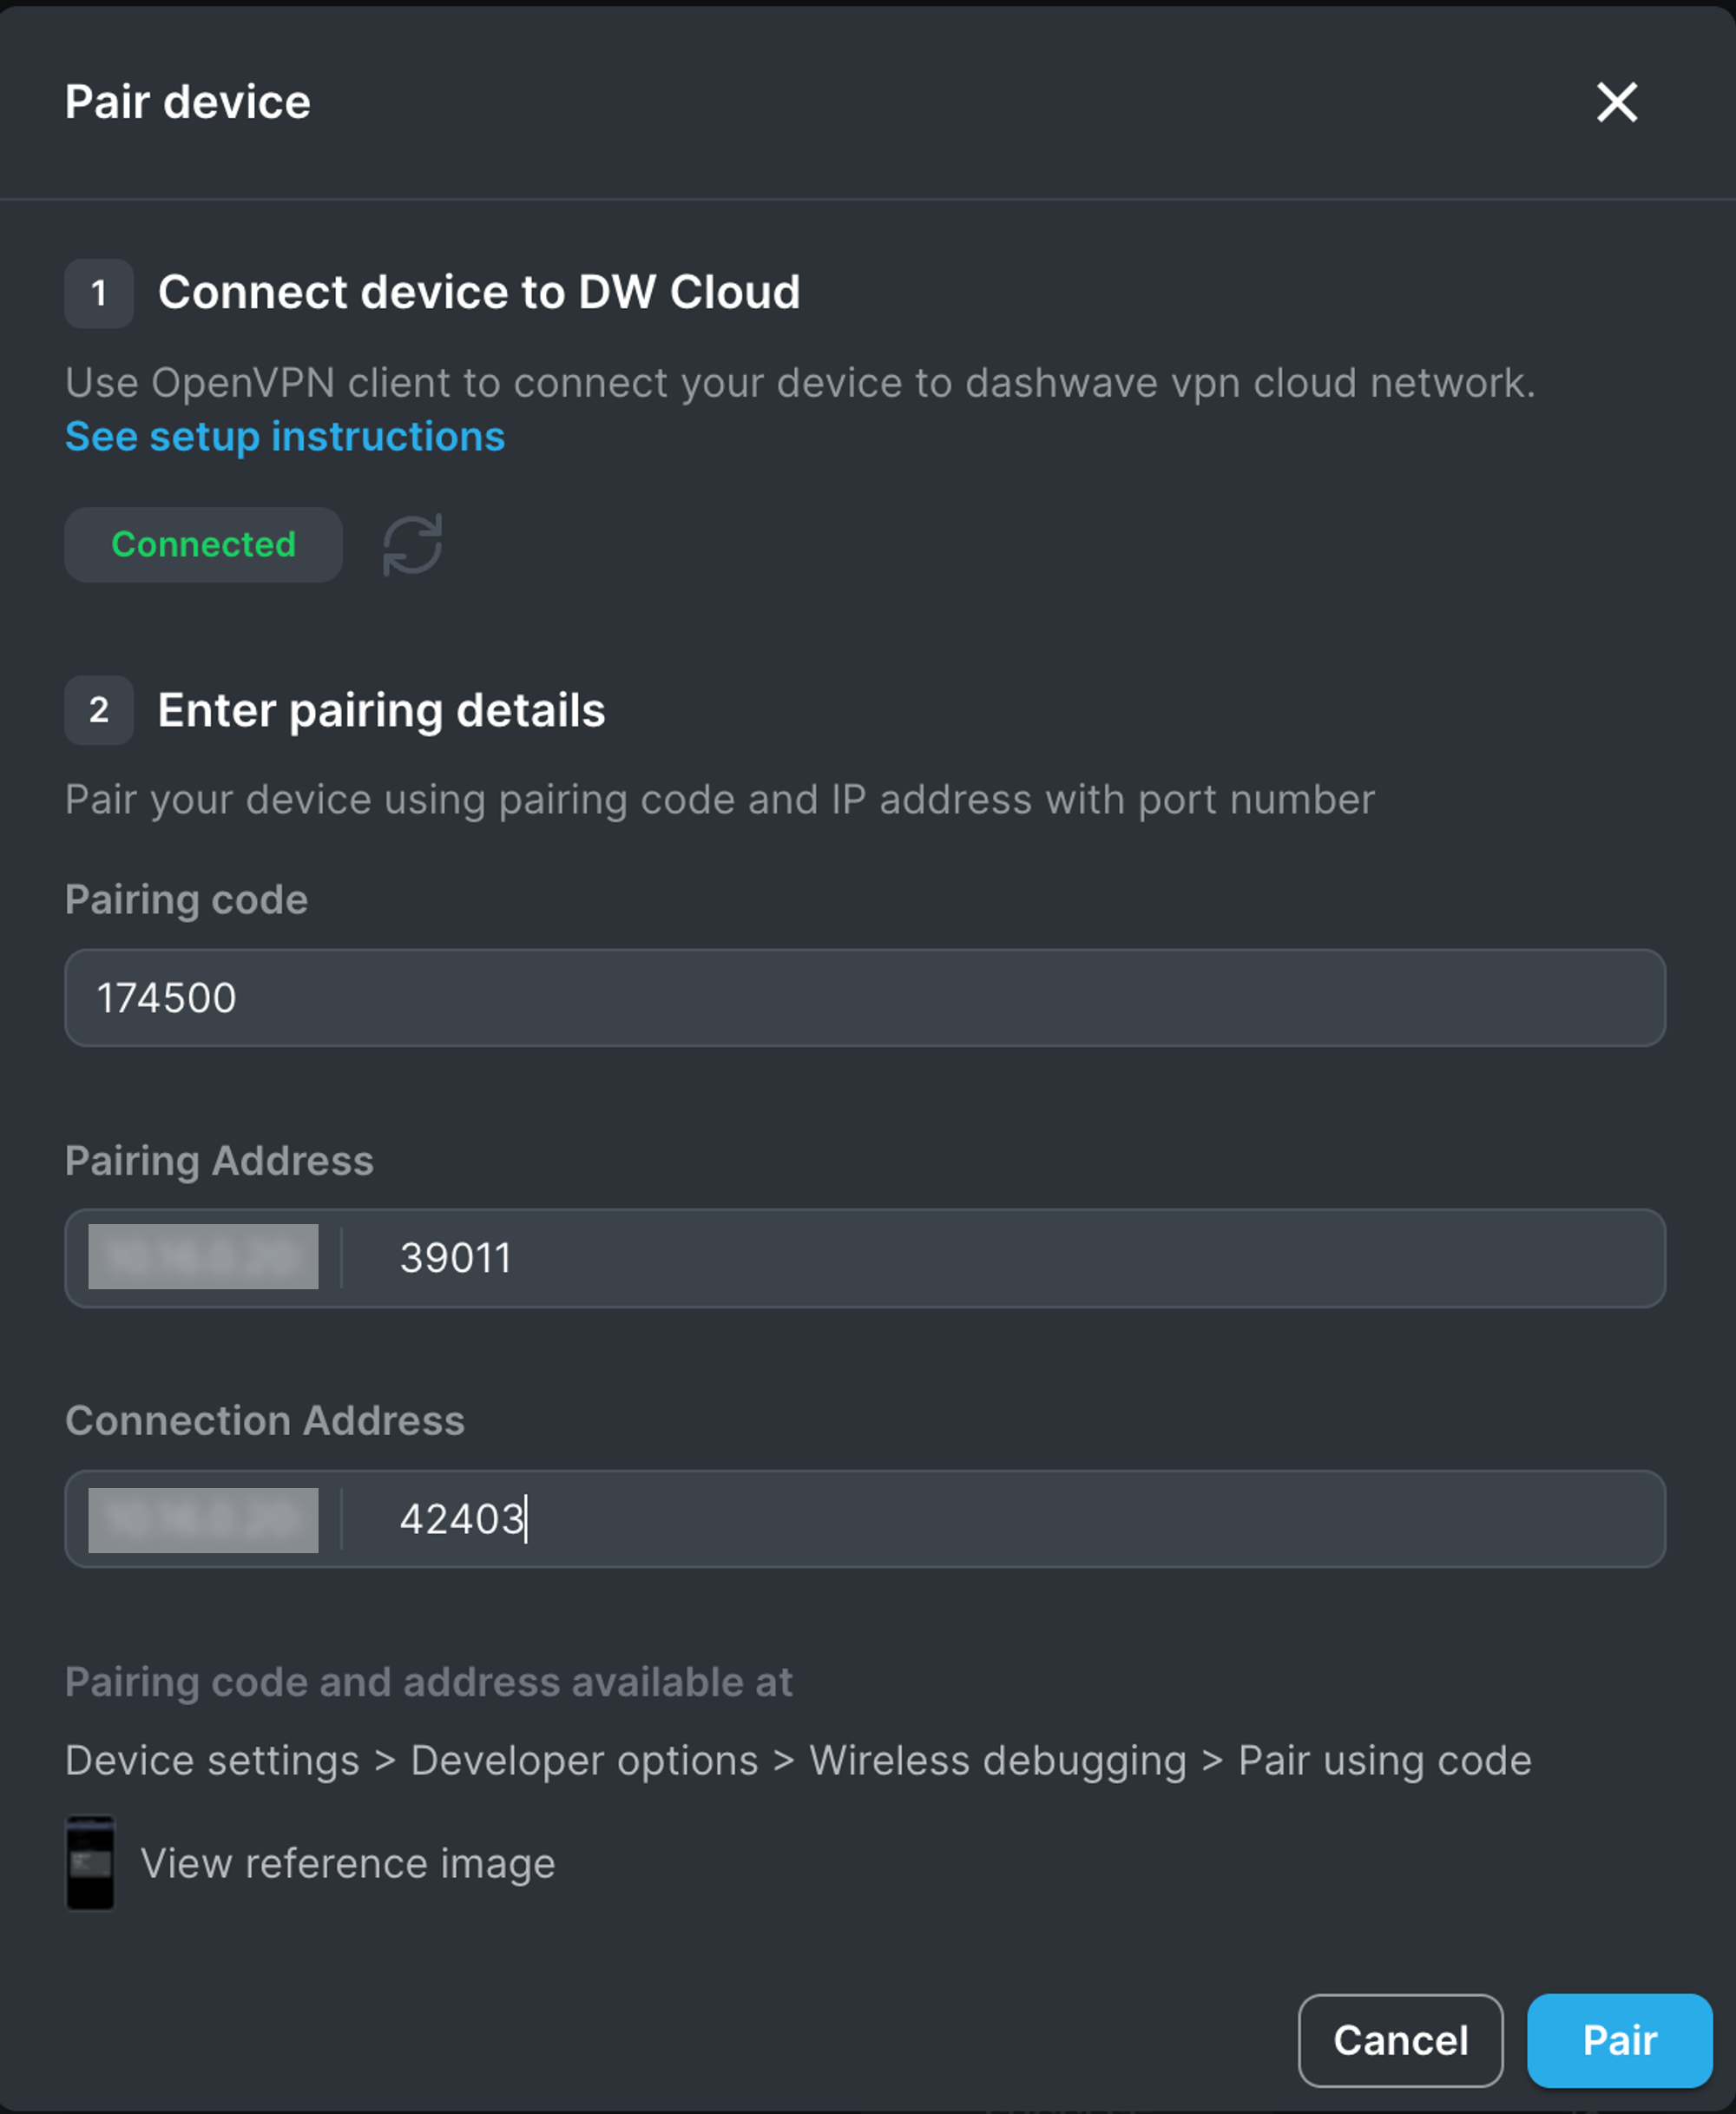
Use the - View reference image option to figure out the pairing and connection address for your device.
- Device should be successfully paired to Dashwave.
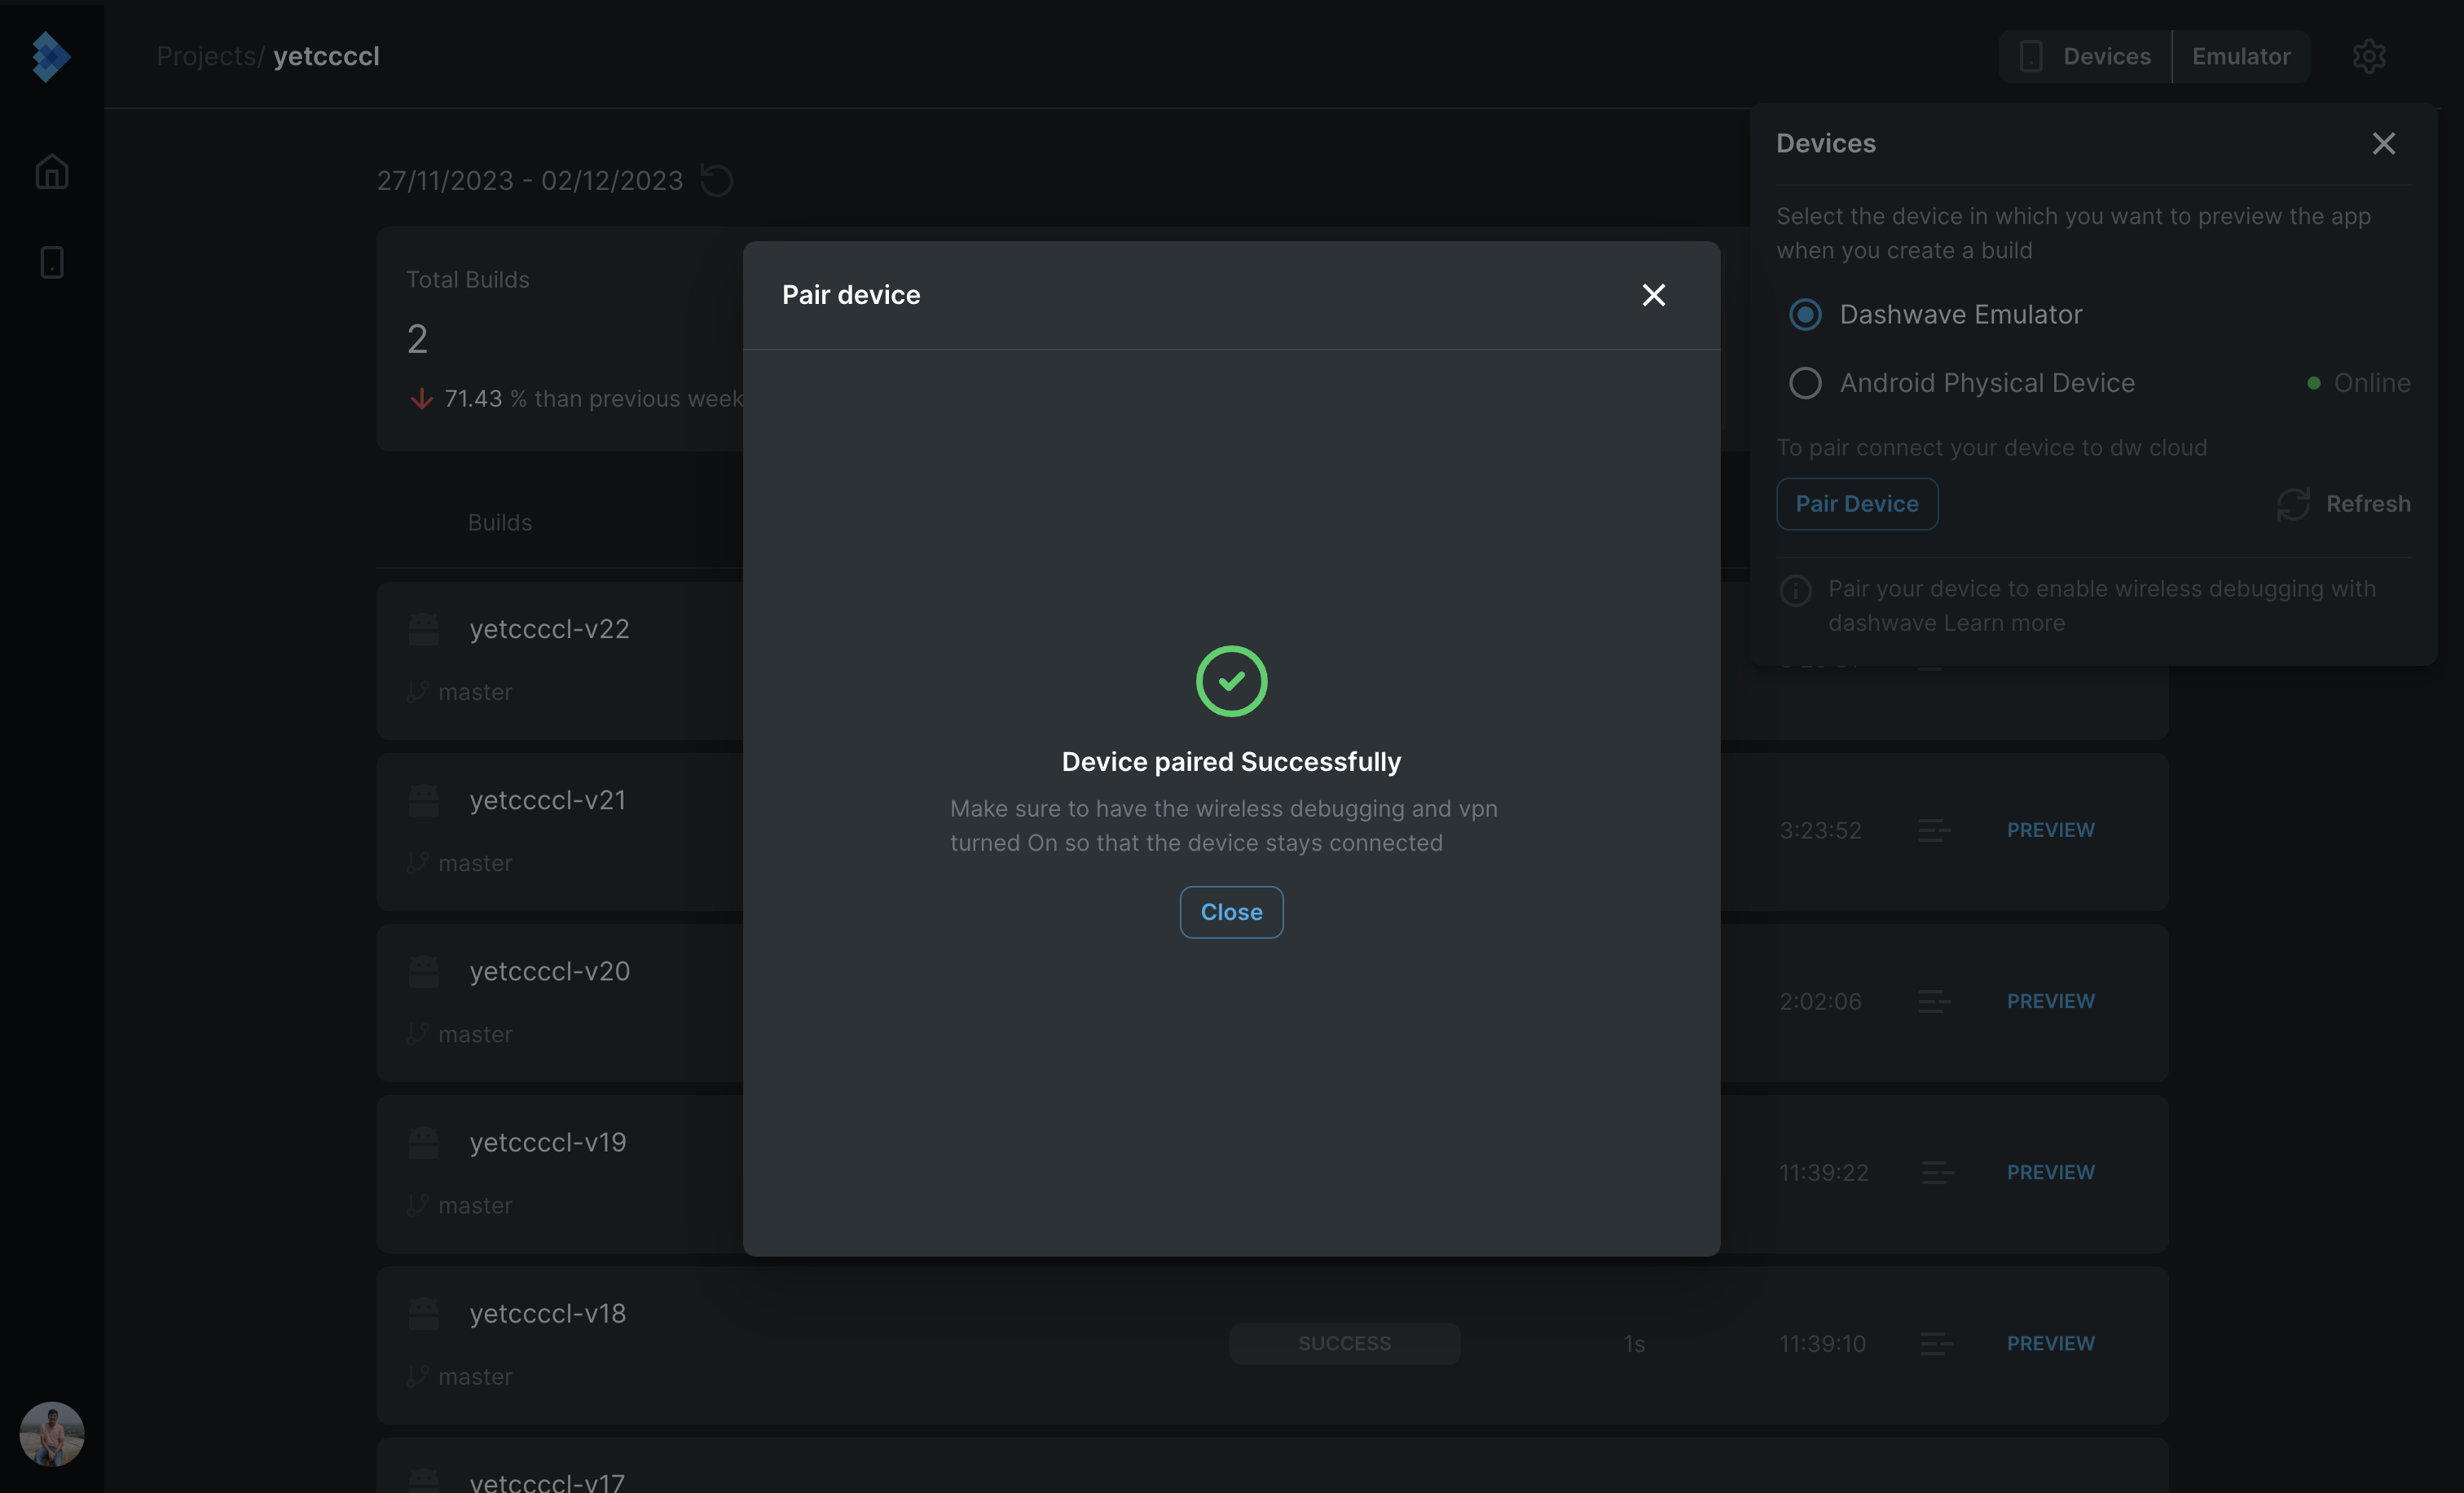
Currently, Dashwave supports pairing of a single physical device per user at a time. If you pair another device, the first one gets removed.
2. Switching to Physical Device for Preview
Once a device is setup on Dashwave, developers can select this device to preview their builds on it. Once paired, the device connection details are saved with us, and user can simply turn on their VPN connection and Wireless debugging to reconnect their device.
A developer might have to re-pair a device in case it was restarted after pairing with Dashwave.
To switch to physical device debugging, select the Emulator Device menu from top-right, and change the device from Dashwave Emulator to your physical device.
2.1 When Device is online
If the physical device is online, simply select the physical device from the menu and close the modal. When you hit preview for any build version, it would open a new screen on console, and trigger the installation of your built apk file on your physical device in the background. You can view your physical device logs on console to debug your application.

If you experience issues in installing the apk, this might be because of an additional layer of security of your android device. You would receive a notification/prompt to ask for permission when you try to install the app over wireless debugging for the first time. In case you accidentally denied it or missed it, you can manually allow installation of apks. To manually allow installation of apks in your device over wireless debugging, go to Security Settings → Enable Installation over USB.
2.2 When device is offline
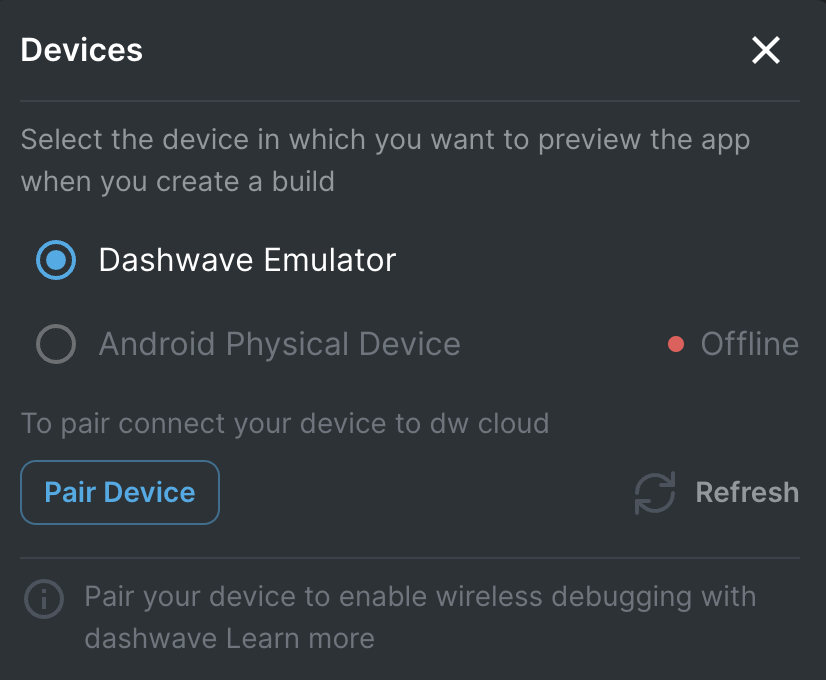
A physical device would go offline if either the VPN connection or wireless debugging is disabled. To make a paired device available to Dashwave:
- Make sure you’re connected to a wifi with good internet connection.
- First turn on VPN connection using OpenVPN Client. Since the connection details were already saved during pairing of device, simply open the OpenVPN application on your device and toggle the connection on.
- Turn on wireless debugging from developer settings.
- Hit refresh devices on console, your device should be available now.
You might want to re-pair your device if Dashwave is not able to find this device online even though you have completed the steps. This might happen if you restarted the device after pairing.
3. Troubleshooting
3.1 APK Preview not opening on physical device
APK Preview might take some time for larger applications depending upon your internet bandwidth. We are working on it to make it faster. If you think that it takes forever for your preview to open, or your preview does not open at all, write to us at support@dashwave.io
4. FAQs
4.1 Why do I need to connect to a VPN for Physical Device Debugging?
Android natively supports wireless debugging on your local network only. When you runs your builds on Dashwave, the outputs are stored on our cloud infra. To enable our infrastructure to connect to your physical device, with the android’s restrictions of it being allowed on a local network, we ask our users to connect their devices on our secured VPN network. This allows our servers to access the adb port of your device, and install apks and fetch devices’ logs.